
vevor ice maker manual
Vevor Ice Maker Manual: Comprehensive Troubleshooting Guide (Updated 03/27/2026)
Today is 03/27/2026 10:14:28 ()․ This manual provides clear steps for diagnosing and solving typical Vevor ice maker problems, ensuring smooth operation․

Welcome to the Vevor Ice Maker Troubleshooting Guide! This resource is designed to empower you, the Vevor ice maker owner, to effectively address common issues and maintain optimal performance․ Whether you’ve recently purchased a compact countertop model or operate a heavy-duty undercounter unit, understanding basic troubleshooting steps can save you time and potentially costly service calls․
This guide isn’t just about fixing problems; it’s about understanding your machine․ We’ll cover everything from simple power supply checks to more complex issues like compressor function and sensor malfunctions․ Remember, proactive maintenance and regular cleaning are key to preventing many problems from occurring in the first place․
Troubleshooting a Vevor ice machine can initially seem daunting, but with a systematic approach and the information provided here, it becomes a manageable task․ We’ll focus on common symptoms, practical solutions, and expert tips to keep your ice maker consistently producing quality ice․ Let’s begin!
Understanding Your Vevor Ice Maker Model
Vevor offers a diverse range of ice makers, each designed with specific features and capacities․ Before diving into troubleshooting, it’s crucial to identify your exact model․ This information is typically found on a label located on the back or bottom of the unit․ Knowing your model number allows you to access specific documentation and tailored support resources․
Different Vevor models utilize varying control panels, ice-making cycles, and component layouts․ Some feature digital displays with error code readouts, while others employ simpler mechanical controls․ Familiarize yourself with the functions of your machine’s buttons, indicators, and settings․
Understanding the basic operational principles – water supply, refrigeration cycle, and ice harvesting – will also aid in effective troubleshooting․ Refer to your original Vevor ice maker manual for a detailed diagram and explanation of your model’s specific components and functions․
Safety Precautions Before Troubleshooting
Prioritizing safety is paramount when attempting any troubleshooting steps on your Vevor ice maker․ Always disconnect the unit from the power outlet before performing any inspections or repairs․ This prevents the risk of electric shock․ Avoid working with wet hands or in damp environments․
Be cautious when handling internal components, as some may have sharp edges․ If you suspect a refrigerant leak, do not attempt to repair it yourself; contact a qualified technician immediately․ Refrigerant is harmful and requires professional handling․
Never disassemble the sealed refrigeration system․ Ensure proper ventilation around the ice maker to prevent overheating․ If you are uncomfortable with any aspect of the troubleshooting process, consult a qualified appliance repair professional․ Your safety and the longevity of your Vevor ice maker are both important․

Common Vevor Ice Maker Problems & Solutions
Typical issues include power failures, water supply disruptions, and ice production problems like thin or excessive ice build-up, alongside compressor malfunctions and leaks․
Ice Maker Not Turning On: Power Supply Issues
Power issues are frequently the initial cause when a Vevor ice maker fails to start․ Begin by verifying the power cord is securely plugged into a functioning electrical outlet․ Test the outlet with another device to confirm it’s delivering power․ Inspect the power cord itself for any visible damage, such as cuts or fraying; a damaged cord requires immediate replacement․
Check the ice maker’s internal fuse or circuit breaker – consult your specific model’s manual for location and reset instructions․ Some Vevor models feature a power switch located on the rear panel; ensure this switch is in the ‘on’ position․ If the problem persists, consider a surge protector; power surges can damage sensitive components․ Troubleshooting power problems first can save significant time and prevent further damage to the ice maker’s internal systems, ensuring optimal ice production․
Water Supply Problems & Solutions
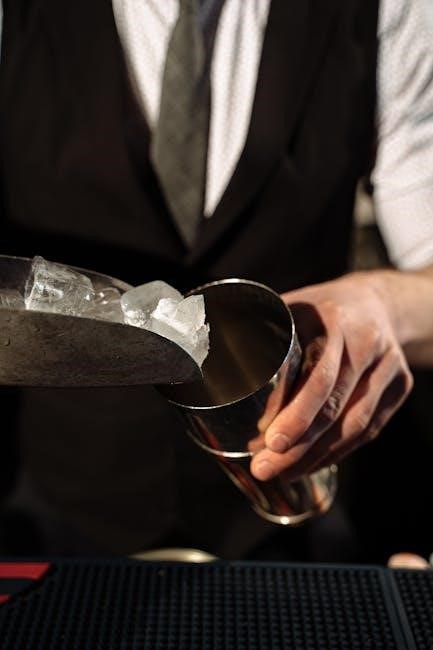
Water supply issues are a common culprit when your Vevor ice maker isn’t producing ice․ First, ensure the water line is properly connected and not kinked or frozen․ Verify the water supply valve is fully open, allowing sufficient water flow to the machine․ Check for any leaks in the water line connections; tighten as needed․
A clogged water filter is a frequent cause of reduced water flow․ Replace the filter according to the recommended schedule (see the ‘Maintenance’ section)․ Sediment buildup within the water inlet valve can also restrict water flow; cleaning or replacing this valve may be necessary․ If using a low-water-pressure source, consider a booster pump․ Addressing these water supply concerns promptly will restore proper ice production and maintain the ice maker’s efficiency․
Ice Maker Not Producing Ice: Initial Checks
When your Vevor ice maker fails to produce ice, begin with some simple initial checks․ Confirm the unit is powered on and the power cord is securely plugged into a functioning outlet․ Verify the unit isn’t in “standby” or “demo” mode․ Ensure the water supply is connected and turned on, as a lack of water is a primary cause․
Check the ambient temperature; most Vevor ice makers require a specific temperature range to operate efficiently․ Inspect the ice storage bin – if it’s full, the machine may automatically stop production․ Finally, examine the ice maker’s display panel for any error codes, which can provide valuable clues about the issue․ Addressing these basic points often resolves the problem quickly․
Thin Ice Formation on Evaporator
Experiencing thin ice formation on the evaporator suggests an issue with the ice-making cycle timing․ This often indicates the harvest cycle isn’t long enough to fully freeze the water․ To remedy this, increase the making time using the “+” button on your Vevor ice maker’s control panel․ Monitor the ice thickness after each adjustment․
Insufficient refrigerant levels can also contribute to thin ice, though this requires professional diagnosis and repair․ A malfunctioning temperature sensor might also be the culprit, preventing the evaporator from reaching optimal freezing temperatures․ Regularly check and adjust settings to ensure proper ice thickness․ If adjustments don’t resolve the issue, professional service is recommended․
Excessive Ice Build-Up on Evaporator
Excessive ice build-up on the evaporator typically signals that the harvest cycle is too frequent or too long, preventing complete ice removal․ To address this, reduce the making time using the “-” button on your Vevor ice maker’s control panel․ Observe the ice production and evaporator condition after each adjustment․
A faulty water inlet valve could also be contributing, continuously supplying water even during the harvest cycle․ Inspect the spray pipe for damage or misalignment; adjust or repair it to ensure proper water distribution․ If the build-up persists despite adjustments, a professional technician should inspect the unit for potential component failures, like a malfunctioning timer or control board․

Detailed Troubleshooting Steps
This section delivers in-depth guidance for diagnosing complex issues, covering compressor functionality, water leaks, cycle irregularities, filter maintenance, and thorough cleaning procedures․
Compressor Issues: Diagnosis & Repair
Diagnosing compressor problems requires careful observation․ If the ice maker isn’t cooling, the compressor might be the culprit․ Listen for unusual noises – a clicking sound could indicate a start relay issue, while a humming sound suggests the compressor is attempting to run but failing․ Check the overload protector; a tripped protector shuts down the compressor to prevent overheating․ Resetting it might resolve the issue, but repeated tripping signals a more significant problem․
Visual inspection is crucial․ Look for signs of physical damage to the compressor or its wiring․ If the compressor isn’t running at all, and the overload protector isn’t the issue, the compressor itself may be faulty and require replacement․ Replacing a compressor is a complex task best left to a qualified technician due to the handling of refrigerant․ Attempting a DIY repair without proper training can be dangerous and void your warranty․ Always prioritize safety and professional assistance when dealing with refrigerant systems․
Water Leaks: Identifying the Source
Water leaks are a common issue with Vevor ice makers․ Begin by inspecting the water supply line and connections for looseness or damage․ Ensure the line is securely attached to both the water source and the ice maker․ Check the drain plug; a poorly fitted or damaged plug can cause leaks․ Also, examine the water tank itself for cracks or punctures – even small ones can lead to significant water loss․
Leaks from the back of the water tank often indicate a problem with the spray pipe, requiring adjustment or repair․ Inspect the evaporator for ice buildup that might be melting and causing overflow․ If the leak originates internally, it could signal a problem with the water pump or internal tubing․ Addressing leaks promptly prevents water damage and ensures efficient operation․ If you’re unable to pinpoint the source, consult a qualified technician․
Ice Maker Cycle Issues: Short or Long Cycles
Irregular ice maker cycles – either too short or excessively long – often indicate a problem with the control system or temperature regulation․ Short cycles may result in insufficient ice production, while long cycles can lead to excessive energy consumption and potential component wear․ Begin by verifying the temperature settings are appropriate for your desired ice output․
Adjust the making time using the “+” button to extend the cycle or the “-” button to shorten it․ A malfunctioning temperature sensor can also cause cycle irregularities; consider testing or replacing it․ Check for ice buildup on the evaporator, as this can disrupt the cycle․ If the issue persists, a problem with the timer or control board may require professional diagnosis and repair․ Consistent cycle monitoring is key to optimal performance․
Filter Problems & Maintenance
Maintaining a clean water filter is crucial for optimal Vevor ice maker performance and ice quality․ Clogged filters restrict water flow, leading to reduced ice production and potential damage to the unit․ Regularly inspect the filter for sediment buildup and replace it according to the recommended schedule – typically every 3 to 6 months, depending on water quality and usage․
Filter replacement is a straightforward process; consult your Vevor ice maker’s specific manual for detailed instructions․ Using a genuine Vevor replacement filter ensures compatibility and continued efficiency․ Ignoring filter maintenance can result in mineral deposits forming within the ice maker, affecting its lifespan and ice clarity․ Prioritize filter checks as part of your routine maintenance schedule for consistently great ice․
Cleaning and Descaling Your Vevor Ice Maker
Regular cleaning and descaling are vital for maintaining your Vevor ice maker’s efficiency and hygiene․ Mineral buildup from water can accumulate over time, reducing ice production and potentially damaging internal components․ Descaling, typically done every 6 months, involves running a descaling solution (following manufacturer’s instructions) through the machine to remove these deposits․
Exterior cleaning should be performed weekly with a mild detergent and water․ Internal cleaning involves emptying the water reservoir, cleaning it with a sanitizing solution, and wiping down all accessible surfaces․ Always disconnect the power before cleaning․ Proper cleaning prevents mold growth and ensures the ice remains fresh and safe for consumption․ Refer to your Vevor manual for specific cleaning guidelines for your model․

Advanced Troubleshooting
Advanced issues may involve error codes, sensor malfunctions, fan motor problems, or refrigerant concerns—often requiring professional service for diagnosis and effective repair solutions․
Error Codes and Their Meanings
Decoding error codes is crucial for pinpointing the source of the problem within your Vevor ice maker․ These codes, displayed on the machine’s control panel, act as diagnostic signals․ For instance, an “E1” code often indicates a sensor malfunction, potentially related to temperature readings․ An “E2” error frequently signals an issue with the water supply – perhaps a blockage or low water level․
“E3” typically points to a compressor failure or operational problem, demanding professional attention․ Other codes might relate to evaporator issues (“E4”), ice full detection errors (“E5”), or fan motor malfunctions (“E6”)․ Always consult your specific Vevor ice maker model’s manual for a complete and accurate list of error codes and their corresponding solutions․ Ignoring these signals can lead to further damage and costly repairs․ Understanding these codes empowers you to address minor issues or accurately communicate the problem to a qualified technician․
Sensor Malfunctions: Identifying and Replacing
Sensor failures within your Vevor ice maker can disrupt the entire ice-making process․ Common symptoms include inconsistent ice production, erratic temperature readings, or error codes related to sensor issues (like “E1”)․ Identifying the faulty sensor often requires a multimeter to test for continuity and voltage․ Key sensors include the water level sensor, temperature sensors (evaporator and condenser), and the ice full sensor․
Replacing a sensor typically involves disconnecting the old sensor, carefully noting its wiring configuration, and installing the new one․ Always disconnect the power before attempting any repairs! Ensure the replacement sensor is specifically designed for your Vevor model․ If you’re uncomfortable with electrical work, it’s best to consult a qualified technician․ Incorrect sensor installation can lead to further malfunctions and potential safety hazards․
Fan Motor Problems: Troubleshooting and Repair
Fan motor issues can significantly impact your Vevor ice maker’s performance, leading to reduced cooling efficiency and potential compressor overheating․ Common signs include unusual noises (grinding or squealing), a lack of airflow, or the ice maker shutting down prematurely․ Begin by visually inspecting the fan blades for obstructions like ice buildup or debris․
To troubleshoot, disconnect the power and check the fan motor for continuity using a multimeter․ A lack of continuity indicates a faulty motor requiring replacement․ Replacing the fan motor usually involves removing the access panel, disconnecting the wiring harness, and installing the new motor․ Ensure the replacement motor is compatible with your specific Vevor model․ If the motor spins freely but doesn’t start, a capacitor issue might be the cause – a technician can diagnose and replace this component․
Refrigerant Issues (Professional Service Required)
Refrigerant problems within your Vevor ice maker are complex and require a qualified technician for diagnosis and repair․ Attempting to handle refrigerant yourself is dangerous and illegal․ Signs of a refrigerant leak include consistently weak ice production, even after addressing other potential issues, or a hissing sound near the compressor․
A technician will use specialized equipment to detect leaks, repair any damaged lines, and recharge the system with the correct type and amount of refrigerant․ They will also check for the root cause of the leak to prevent future occurrences․ Do not attempt to add refrigerant yourself; improper handling can cause severe injury and damage the unit․ Ignoring refrigerant issues can lead to compressor failure and complete ice maker breakdown, necessitating costly repairs or replacement․

Maintenance & Prevention
Regular cleaning, filter replacements, proper ventilation, and winterizing procedures are crucial for optimal Vevor ice maker performance and longevity, preventing future issues․
Regular Cleaning Schedule
Maintaining a consistent cleaning schedule is paramount for your Vevor ice maker’s efficiency and hygiene․ Daily, wipe down the exterior surfaces with a soft, damp cloth to prevent dust and grime buildup․ Weekly, thoroughly clean the water tank and ice storage bin with a mild detergent and sanitize with a diluted bleach solution (ensure complete rinsing afterward!)․
Monthly, descale the ice maker to remove mineral deposits that can affect ice production and quality․ Utilize a commercially available descaling solution specifically designed for ice machines, following the manufacturer’s instructions carefully․ Don’t forget to clean the water filter housing․ A quarterly deep clean should include inspecting and cleaning the condenser coils, ensuring proper airflow․ Ignoring these steps can lead to reduced performance, compromised ice quality, and potential breakdowns, ultimately shortening the lifespan of your Vevor ice maker․
Water Filter Replacement Frequency
The frequency of water filter replacement in your Vevor ice maker directly impacts ice clarity, taste, and the machine’s overall longevity․ Generally, Vevor recommends replacing the water filter every 3 to 6 months, however, this timeframe can vary based on water quality and usage․ If you notice a decrease in ice production, cloudy ice, or an unusual taste, it’s a clear indication that the filter needs immediate replacement․
For areas with particularly hard or sediment-rich water, consider replacing the filter every 3 months․ Regularly inspect the filter for visible buildup or discoloration․ Using a genuine Vevor replacement filter is crucial to ensure optimal performance and prevent damage to the ice maker․ Neglecting filter replacement can lead to scale buildup, reduced efficiency, and potentially costly repairs․ Prioritize filter maintenance for consistently clean and great-tasting ice!
Proper Ventilation for Optimal Performance
Maintaining adequate ventilation around your Vevor ice maker is paramount for efficient operation and preventing overheating․ Ensure there’s at least 6 inches of clear space on all sides – top, back, and both sides – to allow for proper airflow․ Restricted ventilation forces the compressor to work harder, reducing ice production and potentially leading to component failure․
Avoid placing the ice maker in enclosed spaces or directly against walls․ Dust accumulation can also impede airflow, so regular cleaning of the ventilation areas is essential․ Proper ventilation not only enhances performance but also extends the lifespan of your Vevor ice maker․ Prioritizing airflow ensures consistent ice production and minimizes the risk of costly repairs due to overheating or strain on internal components․
Winterizing Your Vevor Ice Maker
When temperatures drop below freezing, taking steps to winterize your Vevor ice maker is crucial to prevent damage․ Begin by completely draining the water reservoir and all internal water lines․ Disconnect the water supply to avoid any residual water remaining in the system․ Thoroughly dry all components, including the evaporator and water pump, to eliminate the risk of ice formation and cracking․
Consider removing the water filter to ensure it doesn’t freeze and potentially burst․ Store the ice maker in a dry, indoor location, ideally above freezing temperatures․ Before resuming use in warmer weather, inspect all connections for leaks and flush the system with fresh water․ Proper winterization safeguards your investment and ensures your Vevor ice maker is ready for optimal performance when you need it․

Resetting Your Vevor Ice Maker
Learn how to reset your VEVOR ice machine with an easy guide, resolving minor issues and restoring optimal functionality for consistent ice production․

Factory Reset Procedure
Performing a factory reset on your Vevor ice maker can resolve persistent issues stemming from customized settings or software glitches․ Before initiating this process, understand that a factory reset will erase all personalized configurations, returning the machine to its original, out-of-the-box state․
Typically, the factory reset procedure involves a specific sequence of button presses․ While the exact method varies depending on your Vevor ice maker model, a common approach includes simultaneously pressing and holding the “Power” and “Reset” buttons for approximately 5-10 seconds․ Observe the control panel for visual cues, such as a flashing light or a specific error code, indicating the reset is in progress․
After releasing the buttons, allow the ice maker to fully power cycle․ This may take a few minutes․ Once restarted, you’ll need to reconfigure your desired settings, including ice thickness, production cycles, and any other personalized preferences․ Consult your specific model’s manual for detailed, step-by-step instructions to ensure a successful factory reset․