
the motor can be started manually with a rheostat
Rheostatic manual starting offers a method for controlling large motors, utilizing a variable resistance to limit initial inrush current, as demonstrated in recent circuit analyses.
Historical Context of Manual Starting Methods
Early industrial motor control relied heavily on manual starting techniques due to the limitations of available technology and the cost-prohibitive nature of automated solutions. Direct-on-line (DOL) starting, while simple, caused significant voltage dips and mechanical stress on the motor and driven equipment. Consequently, methods to reduce inrush current became essential.
Rheostatic control emerged as a practical solution in the early to mid-20th century. Before the advent of sophisticated power electronics, rheostats provided a means to incrementally increase voltage applied to the motor during start-up. This gradual increase limited the initial current draw, mitigating the adverse effects of inrush. The technique was widely adopted across various industries, including manufacturing, mining, and pumping stations, where large motors were commonplace.
Troubleshooting guides from this era, like those detailing 3-phase motor circuits, often emphasized the importance of understanding rheostatic starting principles for effective maintenance and repair.
The Role of Rheostats in Motor Control

Rheostats function as variable resistors strategically inserted into the motor starting circuit. During start-up, the rheostat introduces significant resistance, limiting the current flowing into the motor windings. This controlled current reduction minimizes the mechanical shock to the motor and the associated driven equipment, preventing potential damage.
As the motor gains speed, the rheostat’s resistance is gradually decreased, incrementally increasing the voltage and current supplied. This staged approach allows the motor to accelerate smoothly, reaching full speed without the detrimental effects of a large inrush current. The rheostat effectively manages the voltage-to-current ratio during the critical starting phase.
Modern circuit analysis, even when examining more advanced starting methods, acknowledges the foundational principles established by rheostatic control, as seen in troubleshooting guides for complex motor systems.
Understanding the Components
Essential components include the three-phase motor, a robust rheostat for resistance control, and a carefully designed starter circuit for safe, manual operation.
Three-Phase Motor Fundamentals
Three-phase induction motors are the workhorses of industry, renowned for their efficiency and reliability. These motors operate on the principle of electromagnetic induction, converting electrical energy into mechanical rotational force. Unlike single-phase motors, they don’t require a starting capacitor, inherently possessing a rotating magnetic field when energized with a balanced three-phase power supply.
However, direct connection to the power line results in a massive inrush current – several times the motor’s full-load current – which can cause voltage dips, stress the power system, and potentially damage the motor windings. This is where rheostatic starting becomes crucial. Understanding the motor’s characteristics, like its locked-rotor current and torque, is paramount for selecting the appropriate rheostat resistance and ensuring a controlled start. The motor’s nameplate provides vital information for this process, detailing voltage, current, horsepower, and speed ratings.
Rheostat Construction and Operation
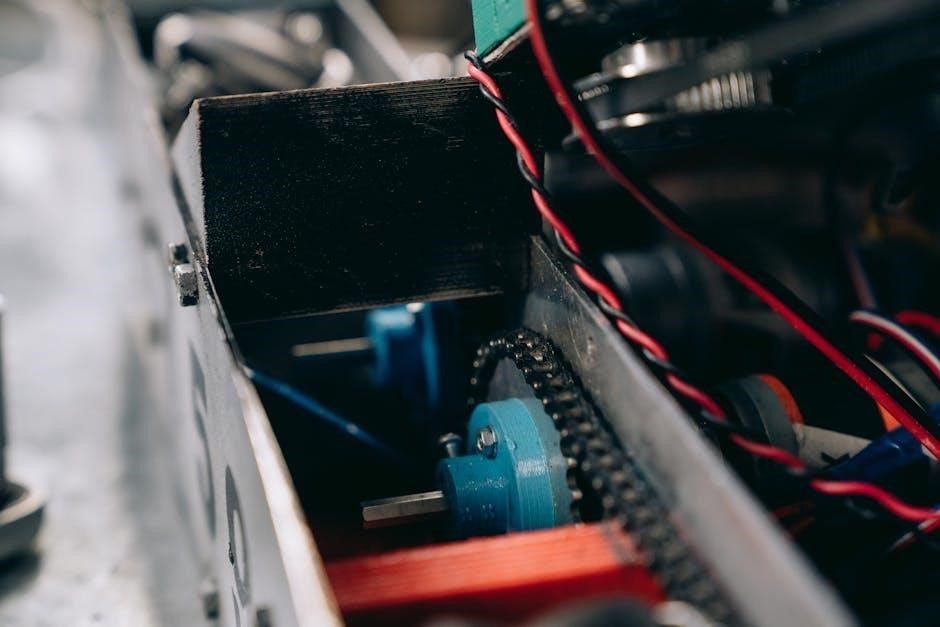
A rheostat, in the context of motor starting, is essentially a variable resistor designed to handle substantial current. Typically constructed with wound resistance wire (often nickel-chromium) around an insulating core, it allows for adjustable resistance by altering the length of the wire included in the circuit. These resistors are often housed in a robust, ventilated enclosure to dissipate the significant heat generated during starting.
During start-up, the rheostat is inserted in series with the motor windings. Increasing the resistance limits the current flow, reducing the torque initially available. As the motor gains speed, the resistance is gradually decreased, allowing more current and increasing torque until the rheostat is fully bypassed and the motor runs at full voltage. Proper rheostat selection considers the motor’s starting current requirements and the rheostat’s power dissipation capacity to prevent overheating and failure.
The Starter Circuit: A Basic Overview
The rheostatic starter circuit fundamentally comprises the three-phase motor, the rheostat itself, and a control mechanism for gradually reducing resistance. Power flows from the supply, through a disconnecting means (like a circuit breaker), then through the rheostat, and finally to the motor windings. A key component is the step-resistance arrangement within the rheostat, allowing for discrete resistance reductions.
Manual operation involves an operator physically shifting connections to bypass sections of the rheostat resistance. This is often achieved using a selector switch or a series of contactors controlled manually. The circuit also includes overload protection, typically thermal overload relays, to safeguard the motor from excessive current draw. Careful circuit design ensures smooth acceleration and prevents damaging current surges during the starting sequence.
The Starting Process with a Rheostat
Manual starting with a rheostat involves progressively decreasing resistance, carefully controlling motor acceleration and limiting inrush current, as seen in troubleshooting guides.
Step-by-Step Starting Procedure
Initiating the start requires confirming the rheostat is positioned at its maximum resistance setting, effectively minimizing initial voltage applied to the motor windings. Subsequently, the main circuit breaker is closed, energizing the control circuit and preparing for motor activation.
Gradually reducing the rheostat’s resistance allows a controlled increase in voltage and current to the motor, enabling it to accelerate smoothly. This process demands constant monitoring of current readings to prevent overloading. As the motor gains speed, the rheostat is incrementally adjusted, diminishing resistance in stages.
Full speed is achieved when the rheostat is completely bypassed or set to minimum resistance, delivering full voltage to the motor. Throughout this procedure, attentive observation of motor behavior and adherence to safety protocols are paramount, ensuring a secure and efficient start-up sequence.
Voltage and Current Control During Start-Up
Rheostatic control fundamentally governs voltage applied to the motor during start-up, directly impacting inrush current. Initially, maximum rheostat resistance restricts voltage, limiting the substantial current surge associated with a direct-on-line start.
As resistance decreases, voltage gradually increases, allowing the motor to develop torque and accelerate. This controlled voltage ramp-up translates to a corresponding, managed increase in current draw, preventing potential stress on the motor windings and the power distribution system.
Precise adjustment of the rheostat is crucial; too rapid a reduction in resistance can lead to excessive current, while too slow a progression may hinder motor acceleration. Continuous monitoring of both voltage and current parameters ensures optimal starting performance and safeguards against damage.
Reducing Inrush Current with Rheostatic Control
Rheostatic starting excels at mitigating the significant inrush current characteristic of motor start-up. This method introduces adjustable resistance into the motor circuit, initially presenting a high impedance that drastically limits the flow of current.
The rheostat effectively acts as a current limiter, preventing the momentary, high-demand surge that can stress electrical infrastructure and potentially cause voltage dips. By gradually reducing the resistance, the applied voltage increases, and current rises in a controlled manner.
This controlled acceleration minimizes mechanical shock to the motor and driven equipment, extending their lifespan. The degree of inrush current reduction is directly proportional to the initial rheostat resistance value, offering a customizable solution for various motor and load requirements.

Advantages and Disadvantages
Rheostatic starting provides controlled acceleration, but it’s less efficient and requires manual operation, presenting limitations compared to modern, automated motor control solutions.
Benefits of Manual Rheostat Starting
Manual rheostat starting presents several advantages, particularly in specific industrial applications and legacy systems. A key benefit is its simplicity; the method requires fewer components than more complex starting techniques, potentially lowering initial costs and simplifying maintenance procedures. This simplicity also translates to easier troubleshooting for personnel familiar with basic electrical principles.
Furthermore, rheostatic control offers a degree of adjustability, allowing operators to fine-tune the starting characteristics based on the load and motor requirements. This is especially useful in applications where a smooth, controlled acceleration is crucial to prevent mechanical stress on the driven equipment. The method’s inherent current-limiting capability protects the motor from damaging inrush currents, extending its lifespan and reducing the risk of electrical system disturbances. While not as precise as modern solutions, it provides a viable and often cost-effective starting method for certain motor types and sizes.
Limitations and Safety Concerns
Manual rheostat starting, despite its benefits, presents notable limitations and safety concerns. A significant drawback is the substantial power dissipation within the rheostat itself, generating considerable heat that necessitates adequate ventilation and robust construction. This heat represents wasted energy, reducing overall system efficiency compared to modern alternatives.
Moreover, manual operation introduces a degree of human error, potentially leading to improper starting procedures or delayed responses to abnormal conditions. The exposed rheostat elements and associated wiring pose electrical hazards, demanding strict adherence to lockout/tagout procedures and the use of appropriate personal protective equipment. Furthermore, the method offers limited current control as the motor accelerates, potentially leading to voltage dips affecting other equipment on the same power system. Regular inspection and maintenance are crucial to mitigate these risks and ensure safe operation.

Troubleshooting Common Issues
Effective troubleshooting requires systematic checks of the rheostat, motor connections, and control circuits to pinpoint faults impacting manual starting performance and safety.
Identifying Rheostat Failures
Diagnosing rheostat issues is crucial for maintaining reliable manual motor starting. Begin by visually inspecting the rheostat for physical damage, such as cracks in the insulating material or signs of overheating, like discoloration or melted components. A common failure mode involves open windings within the resistance elements, detectable with an ohmmeter – a reading of infinite resistance indicates a break.
Intermittent contact can also occur due to corrosion or dirt accumulation on the brush or contact surfaces, leading to fluctuating motor speed or starting difficulties; cleaning these contacts often resolves the issue. Measure the resistance across each tap of the rheostat to verify consistent and expected values. Significant deviations suggest localized heating or winding degradation. Finally, check the rheostat’s connections for looseness or corrosion, as poor connections can mimic internal failures.
Diagnosing Motor Starting Problems
Troubleshooting motor starting issues with a rheostatic control requires a systematic approach. First, verify the control circuit voltage reaches the rheostat when the start button is engaged. If voltage is present, but the motor doesn’t start, inspect the rheostat itself for continuity and proper resistance values across each tap. A failed rheostat will prevent current flow or provide insufficient resistance for starting.

Next, check the motor windings for shorts or open circuits using a multimeter. Low insulation resistance indicates winding damage. If the motor hums but doesn’t turn, suspect mechanical issues like a seized bearing or a blocked load. Confirm proper phase rotation; reversed phases can cause the motor to stall. Finally, examine all connections for tightness and corrosion, as loose connections can interrupt current flow and hinder starting.
Common Control Circuit Faults
Control circuit failures are frequent causes of issues when using rheostatic motor starting. A common problem is a faulty start button or associated contactor, preventing voltage from reaching the rheostat. Inspect these components for burned or pitted contacts. Blown fuses or tripped circuit breakers in the control circuit will also halt the starting sequence; always replace fuses with the correct amperage rating.
Wiring issues, such as loose connections or damaged insulation, can interrupt the control signal. Check for proper continuity throughout the control wiring. Relay failures within the circuit can also prevent proper operation. Finally, ensure the overload relay is correctly set and functioning; a tripped overload relay will interrupt the control circuit, halting the motor start.
Modern Alternatives and Comparisons
Contemporary motor control increasingly favors solid-state starters and VFDs, offering superior performance and protection compared to traditional rheostatic manual starting methods.
Solid-State Starters vs. Rheostatic Starting
Solid-state starters represent a significant advancement over rheostatic control, employing thyristors or other semiconductor devices to gradually increase voltage applied to the motor. Unlike rheostats, which dissipate energy as heat during starting, solid-state starters offer near-lossless voltage control, improving efficiency and reducing operating costs.
Rheostatic starting, while historically relevant, suffers from limitations like substantial heat generation within the rheostat itself, requiring significant ventilation and maintenance. Solid-state starters provide smoother acceleration profiles and more precise current limiting, minimizing mechanical stress on the motor and driven equipment. Furthermore, they often incorporate built-in protection features, such as overload and short-circuit protection, enhancing system reliability and safety compared to the simpler, manually-operated rheostat systems.
The increased sophistication of solid-state starters allows for remote control and integration into automated systems, a capability absent in traditional rheostatic methods.
Variable Frequency Drives (VFDs) for Motor Control
Variable Frequency Drives (VFDs) offer a far more sophisticated approach to motor control than either rheostatic or solid-state starting methods. VFDs control both the voltage and frequency supplied to the motor, enabling precise speed control and optimized performance across a wide range of applications. While rheostatic starting focuses solely on limiting inrush current, VFDs provide comprehensive control throughout the entire operating cycle.
Unlike the stepped starting of a rheostat, VFDs deliver a smooth, ramped acceleration, minimizing mechanical shock and reducing stress on the motor windings and connected equipment. They also offer advanced features like energy optimization, process control integration, and comprehensive motor protection. Though initially more expensive than rheostatic solutions, VFDs often deliver a lower total cost of ownership due to increased efficiency and reduced maintenance.
VFDs represent a paradigm shift from simple starting methods to intelligent motor management.
Cost Analysis: Rheostat vs. Modern Solutions
Initial investment for a rheostatic starter is typically lower than that of solid-state starters or Variable Frequency Drives (VFDs). However, a comprehensive cost analysis reveals a different picture. Rheostats consume significant power during start-up due to the resistive heating, leading to increased energy costs over the motor’s lifespan. Furthermore, the large size and specialized construction of rheostats contribute to higher material and installation expenses.
Solid-state starters offer a middle ground, balancing initial cost with improved efficiency and control. VFDs, while having the highest upfront cost, often provide the lowest total cost of ownership. Their energy-saving capabilities, reduced mechanical stress on the motor, and advanced diagnostic features translate into long-term savings. Considering maintenance, lifespan, and operational efficiency, modern solutions frequently outperform traditional rheostatic control.

Safety Precautions
Prioritize safety when manually starting motors with rheostats; implement strict lockout/tagout procedures, utilize appropriate PPE, and ensure functional emergency stop mechanisms are readily available.
Lockout/Tagout Procedures
Implementing robust lockout/tagout (LOTO) procedures is paramount when working with rheostat-controlled motor starters, especially during maintenance or troubleshooting. Before any work commences, completely de-energize the motor circuit at the main disconnect. Apply a properly labeled lockout device to this disconnect, ensuring it physically prevents accidental re-energization.
Each individual working on the system must apply their personal tag to the lockout device, clearly identifying themselves as the worker responsible. Verify the absence of voltage with a calibrated meter before proceeding. Extend LOTO procedures to any associated control circuits, including the rheostat itself, to prevent unexpected activation. Document the LOTO process, and only remove the lockout/tagout devices after confirming all personnel are clear and the system is safe to re-energize.
Personal Protective Equipment (PPE)
Appropriate Personal Protective Equipment (PPE) is crucial when interacting with rheostat-based motor starting systems, safeguarding against potential electrical and mechanical hazards. At a minimum, wear safety glasses with side shields to protect against flying debris or accidental arc flash. Electrical hazard-rated gloves, tested and certified for the voltage levels present, are essential for handling any energized components or wiring.
Flame-resistant (FR) clothing provides a vital layer of protection in the event of an arc flash. Wear sturdy, closed-toe footwear to protect against impacts and electrical shock. Depending on the work environment, consider additional PPE such as hard hats and hearing protection. Regularly inspect all PPE for damage before each use, and ensure it fits properly for maximum effectiveness. Prioritize safety and always adhere to established PPE guidelines.
Emergency Stop Mechanisms
Reliable emergency stop (E-Stop) mechanisms are paramount when utilizing manual rheostat motor starting, providing immediate shutdown capability in hazardous situations. These mechanisms should be strategically located for easy access by personnel, including near the rheostat control panel and the motor itself; E-Stop buttons must be clearly labeled and readily identifiable, adhering to established safety standards.
Functionality should be regularly tested to ensure responsiveness and proper operation. The E-Stop circuit must be designed to directly interrupt power to the motor, overriding the rheostat control. Consider incorporating multiple, independent E-Stop circuits for redundancy. Proper signage detailing E-Stop procedures should be prominently displayed. Regular training on E-Stop usage is vital for all personnel involved in motor operation and maintenance.