easy steps weaving loom instructions
Welcome to the world of weaving! A loom is a versatile tool that simplifies the process of interlacing yarns to create beautiful fabrics and designs. Perfect for beginners, it offers an easy way to start crafting unique textiles, from wall decorations to intricate tapestries, with minimal effort and maximum creativity.
1.1 What is a Weaving Loom?
A weaving loom is a device used to interlace two sets of yarns—warp and weft—to create fabric or textiles. Available in types like frame, table, and floor looms, it provides structure and tension for weaving. Portable, easy to use, and versatile, looms are perfect for beginners, allowing them to craft wall decorations, tapestries, and more with precision and creativity.
1.2 Benefits of Using a Loom for Weaving
Using a loom offers several advantages, especially for beginners. It provides portability, making it easy to weave anywhere. Looms simplify the process of maintaining even tension, ensuring professional-looking results. They also allow for creativity and versatility, enabling the creation of various projects, from small decorations to intricate designs. This tool is essential for consistent and high-quality weaving experiences.
Choosing the Right Loom for Beginners
Selecting the right loom is crucial for a smooth weaving experience. Consider ease of use, portability, and cost-effectiveness to find a loom that suits your needs perfectly.
2.1 Types of Looms: Frame, Table, and Floor Looms
Frame looms are portable and ideal for small projects, while table looms offer versatility for various techniques. Floor looms are robust, suitable for large-scale weaving, and provide precise control over complex designs, making them a great investment for dedicated crafters.
2.2 Features to Look for in a Beginner-Friendly Loom
A good beginner loom should be easy to assemble and use, with clear instructions. Look for sturdy construction, adjustable tension, and simple heddle systems. Portability is a plus, allowing you to weave anywhere. Ensure it fits your budget and project size, making your weaving journey enjoyable and stress-free from the start.
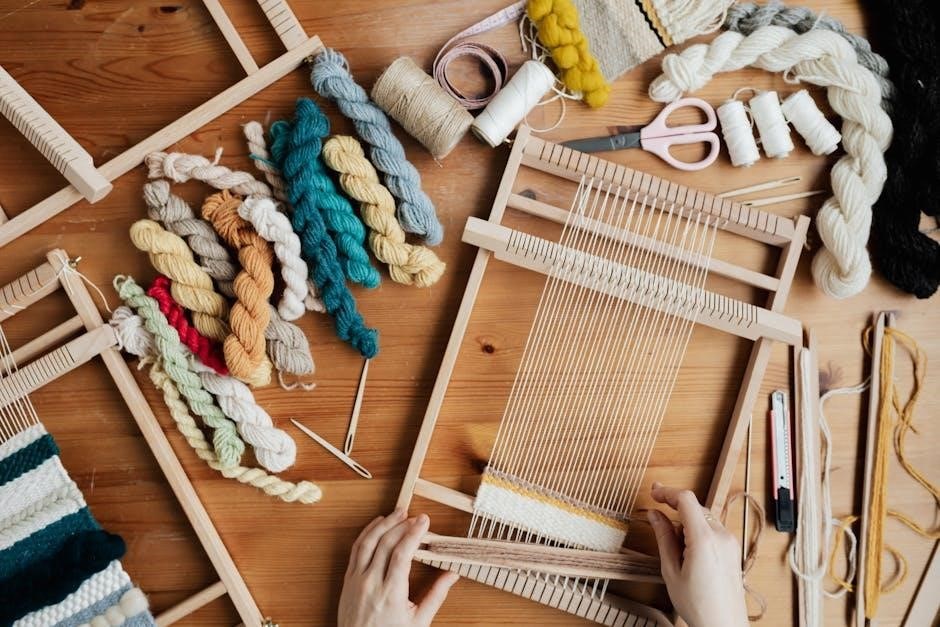
Materials and Tools Needed
Gather essential supplies, including yarn, a shuttle, heddle, threading hook, and measuring tape. Choose durable, high-quality materials to ensure smooth weaving and lasting results.
3.1 Yarns and Fibers for Weaving
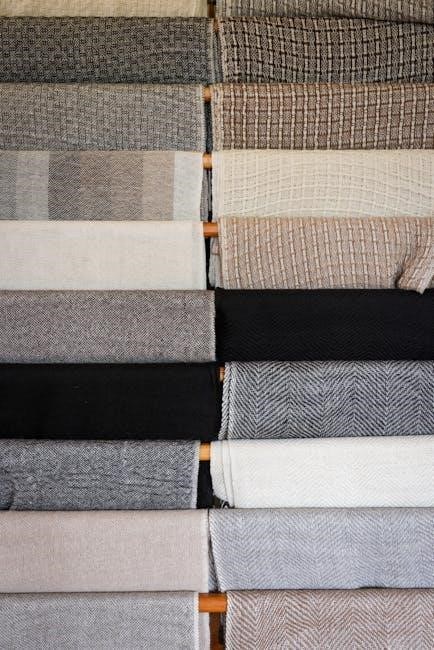
Start by selecting yarns and fibers that suit your project. Acrylic, wool, and cotton are popular choices for beginners due to their softness and durability. Consider blending colors and textures to create visually appealing designs. The right yarn choice sets the foundation for a successful and enjoyable weaving experience, allowing you to craft unique fabrics with ease.
3.2 Essential Tools: Shuttle, Heddle, and Threading Hook
The shuttle carries the weft yarn through the warp, while the heddle separates threads for proper alignment. A threading hook helps pull yarns through heddle slots. These tools streamline the weaving process, ensuring accuracy and ease. They work together to create a balanced fabric, making weaving accessible and efficient for beginners and experienced crafters alike.
Setting Up Your Loom
Setting up your loom involves creating a warp, threading it through heddles, and tensioning it evenly. This foundational step ensures a smooth and balanced weaving experience.
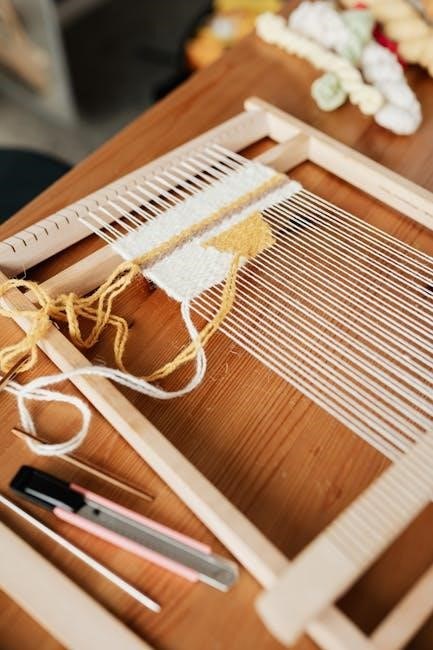
4.1 Creating the Warp: Step-by-Step Guide
Creating the warp is the first step in setting up your loom. Start by tying an overhand loop knot at the end of your warp yarn and fasten it to the top left peg. Wrap the yarn down to the bottom peg, then back up, repeating this process evenly across the loom. Ensure consistent tension to avoid loose or tight spots. Once all warp threads are in place, secure them firmly to maintain stability. This process lays the foundation for a balanced and successful weaving project.
4.2 Threading the Warp Through Heddles
Using a threading hook, carefully pull each warp yarn through the heddle slots, ensuring they are in the correct order. Start from the first warp thread and work systematically across the loom. Maintain consistent spacing and tension to prevent tangles or unevenness. This step ensures accurate interlacing of the weft yarn in the next stages of weaving, laying a smooth foundation for your project.
4.3 Tensioning the Warp for Even Weaving
Properly tensioning the warp ensures even weaving and prevents sagging or uneven fabric. Gently pull the warp threads, adjusting each to maintain consistent tightness. Use a threading hook or fingers to tighten loosely. Check the warp periodically to ensure it lies flat and taut. Proper tensioning creates a stable foundation for interlacing the weft yarn smoothly and evenly, essential for a professional finish.
Basic Weaving Techniques
Mastering basic weaving techniques involves understanding the interaction between warp and weft yarns. Start with simple interlacing patterns and gradually explore more complex designs as you gain confidence.
5.1 Understanding Warp and Weft
The foundation of weaving lies in understanding warp and weft. The warp is the set of yarns stretched vertically on the loom, while the weft is the yarn woven horizontally through the warp. Properly setting the warp ensures even tension, allowing the weft to interlace smoothly, creating a stable and visually appealing fabric. This basic principle is essential for all weaving projects, whether simple or complex, and is the starting point for any beginner looking to master the craft.
5.2 Simple Weaving Patterns for Beginners
Start with basic patterns like plain weave, twill, or tabby. Plain weave involves alternating over-and-under motions with the weft yarn, creating a simple, tight fabric. Twill adds texture by shifting the weft yarn in a diagonal pattern. Tabby is similar to plain weave but uses two weft yarns for added thickness. These patterns are easy to learn and require minimal tools, making them perfect for beginners to practice and build confidence in their weaving skills.
Step-by-Step Weaving Process
Begin by creating the warp and securing it on the loom. Start your first row by interlacing the weft yarn through the warp threads. Maintain even tension and follow basic techniques to build a strong foundation for your weaving project.
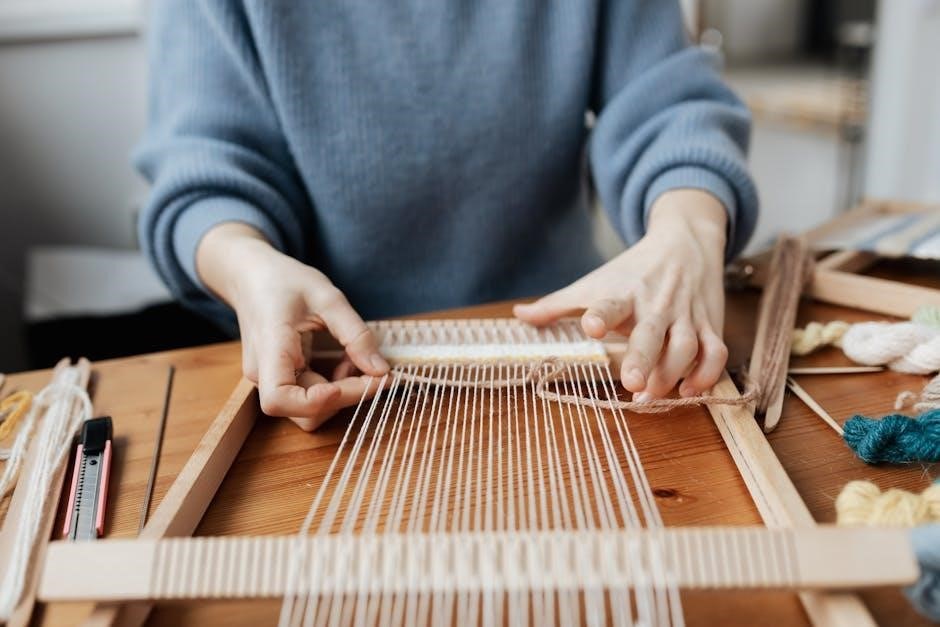
6.1 Starting Your First Row
Begin by gently pulling the weft yarn through the warp threads, starting at the edge. Secure the yarn with a small knot or pin. Use a shuttle or your hands to guide the yarn evenly, ensuring consistent tension. This foundational row sets the stage for your weaving project, so take your time to keep it straight and aligned. The satisfaction of seeing your first row completed will inspire you to continue!
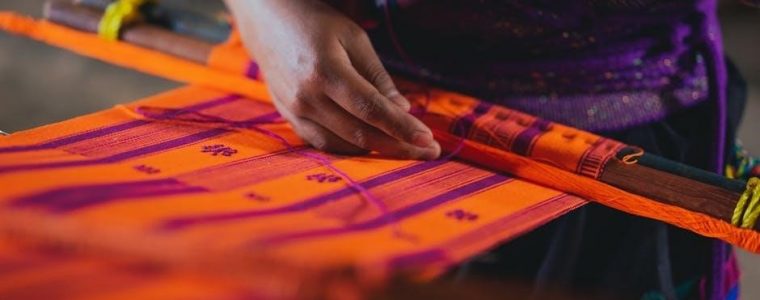
6.2 Interlacing the Weft Yarn
Once your first row is secure, begin interlacing the weft yarn by passing it over and under the warp threads in a steady rhythm. Use a shuttle or your hands to guide the yarn, ensuring it lies flat and evenly. Gently pull the yarn to maintain consistent tension, then use a fork or similar tool to beat it into place. Check for even spacing and adjust as needed to avoid loose or tight spots. This step forms the heart of your weaving, creating a solid foundation for more complex patterns. Keep your movements smooth and deliberate, enjoying the rhythmic process of building your design row by row.

Tips for Successful Weaving
Maintain consistent tension while weaving to ensure even fabric. Use a shuttle or fork to guide yarn smoothly, keeping it flat and evenly spaced for professional results.
7.1 Maintaining Consistent Tension
Maintaining consistent tension is crucial for even weaving. Start by ensuring the warp is taut but not overly tight. Use a shuttle or fork to guide the weft yarn smoothly, keeping it flat and evenly spaced. Avoid loose or overly tight passes, as this can lead to uneven fabric. Regularly check and adjust tension to achieve professional-looking results and prevent warping or sagging.
7.2 Avoiding Common Mistakes
Common mistakes include uneven tension, loose weft yarn, or over-tightening the warp. To avoid these, ensure the warp is taut but not rigid, and the weft lies flat. Regularly inspect your work, correcting any unevenness promptly. Using the right tools, like a shuttle or fork, helps maintain consistency. Practice patience and gentle handling to prevent fibers from breaking or tangling, ensuring a smooth weaving process.
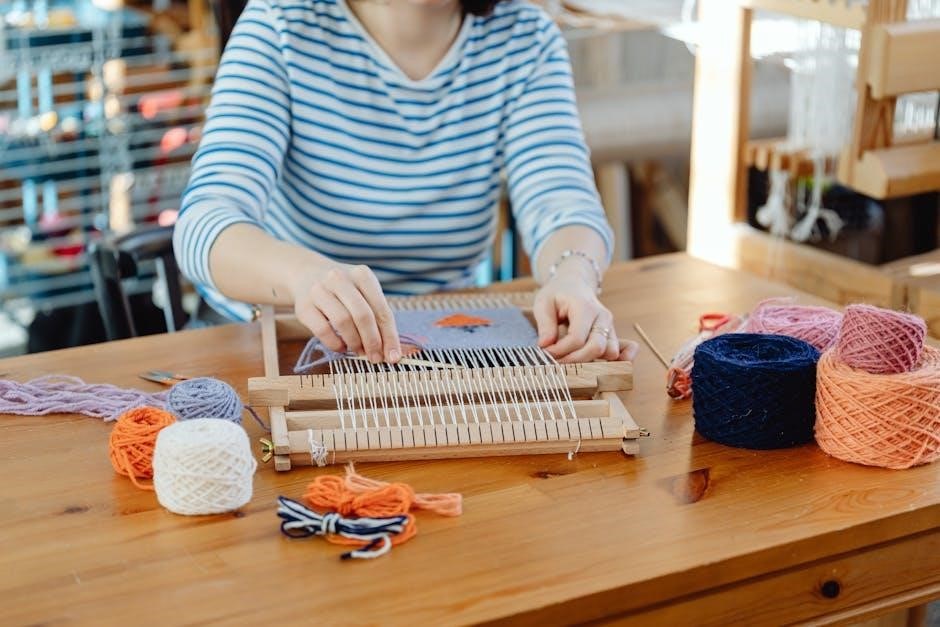
Easy Projects to Get Started
Begin with simple wall hangings or small tapestries to practice basic techniques. These projects allow creativity while mastering the fundamentals of weaving on a loom.
8.1 Weaving a Wall Decoration
Start by creating a simple warp on your loom using yarn or string. Choose vibrant colors and textures for visual appeal. Begin weaving by interlacing the weft yarn through the warp threads, experimenting with basic patterns like over-under or twining. Keep the design minimal for a modern look or add embellishments like beads. Secure the last row tightly and trim loose ends for a polished finish. This project is perfect for practicing basic weaving skills while creating a unique piece of home decor. Display your wall decoration proudly as a testament to your newfound crafting abilities!
8.2 Creating a Small Tapestry
Rebecca Mezoff’s tapestry diaries inspire small-scale weaving projects. Begin by planning your design, choosing yarns that reflect your artistic vision. Set up a small warp on a portable loom, ideal for tapestry work. Weave row by row, experimenting with colors and textures. This compact project allows for creativity on the go, resulting in a meaningful and decorative piece to treasure or share.
Advanced Techniques for Improvement
Explore intricate patterns by incorporating multiple colors and textures. Experiment with unique yarn combinations and designs to enhance your projects, creating visually striking and complex fabrics.
9;1 Adding Colors and Textures
Enhance your weaving by experimenting with diverse yarn colors and textures. Combine thick and thin threads for depth, or introduce metallic yarns for a modern touch. Variegated yarns can create subtle shifts in hue, while natural fibers like wool or linen add organic appeal. These elements bring complexity and visual interest to your designs, making each piece unique and captivating.
9.2 Incorporating Patterns and Designs
Elevate your weaving by incorporating patterns and designs. Use stripes, chevrons, or geometric shapes to add visual interest. Experiment with techniques like twining or soumak for unique textures. Simple tools like a shuttle or fork can help create intricate designs. For inspiration, explore online tutorials or weaving guides that offer step-by-step instructions for various patterns and styles to enhance your projects creatively.
Finishing Your Weaving Project
Secure the last row by tying off threads neatly. Trim excess yarn and tuck ends. For display, iron gently or stretch on a frame to maintain shape.
10.1 Securing the Last Row
To finish your project, gently pull the last weft yarn tight and secure it by tying a small knot or tucking it under the warp. This ensures the fabric stays intact and prevents unraveling. Use a tapestry needle to weave in any loose ends, creating a clean and polished edge. This step is crucial for durability and professional finish.
10.2Trimming and Displaying Your Work
10.2 Trimming and Displaying Your Work
Once your weaving is complete, carefully trim any loose yarn ends with sharp scissors to ensure a neat finish. To display, stretch your work on a frame or attach it to a sturdy dowel for hanging. For a polished look, consider mounting it in a frame or using a fabric hanger. Get creative with display options to showcase your unique piece!
Maintenance and Care of Your Loom
Regularly clean your loom with a soft cloth to remove dust and debris. Store it in a dry place to prevent damage. Proper care ensures longevity and optimal performance for future projects.
11.1 Cleaning and Storing the Loom
Cleaning your loom regularly is essential to maintain its functionality. Use a soft, dry cloth to wipe away dust and debris. For stubborn dirt, a slightly damp cloth can be used, but avoid harsh chemicals. Store the loom in a dry, cool place to prevent warping or damage. Proper storage ensures your loom remains in great condition for future projects. Always check for yarn residue before putting it away.
11.2 Adjusting and Repairing the Loom
Regularly inspect and tighten screws to ensure stability. If parts are misaligned, gently adjust them with a mallet. For repairs, use wood glue for small cracks or replace damaged components. Proper maintenance ensures your loom remains functional and sturdy for future projects. Always check for loose joints and address them promptly to avoid weaving disruptions.
Exploring Different Looms
Discover the variety of looms, from portable frame looms for small projects to versatile table looms and robust floor looms for large-scale creations, each catering to different weaving needs and preferences.
12.1 Frame Looms for Portability
Frame looms are ideal for portability, offering a compact and lightweight design perfect for small projects. Their simplicity makes them great for beginners, allowing easy setup and use. Many frame looms feature notches or nails for straightforward warping, eliminating the need for complex systems. This portability enables weaving anywhere, making them a favorite for crafters who enjoy working on the go or in limited spaces.
12.2 Table Looms for Versatility
Table looms are highly versatile, offering a balance between portability and functionality. They are suitable for small to medium-sized projects and often feature adjustable tension systems, making them ideal for various weaving techniques. Their compact design allows for easy placement on a table or workstation, while their robust construction supports intricate patterns and designs, catering to both beginners and intermediate weavers.
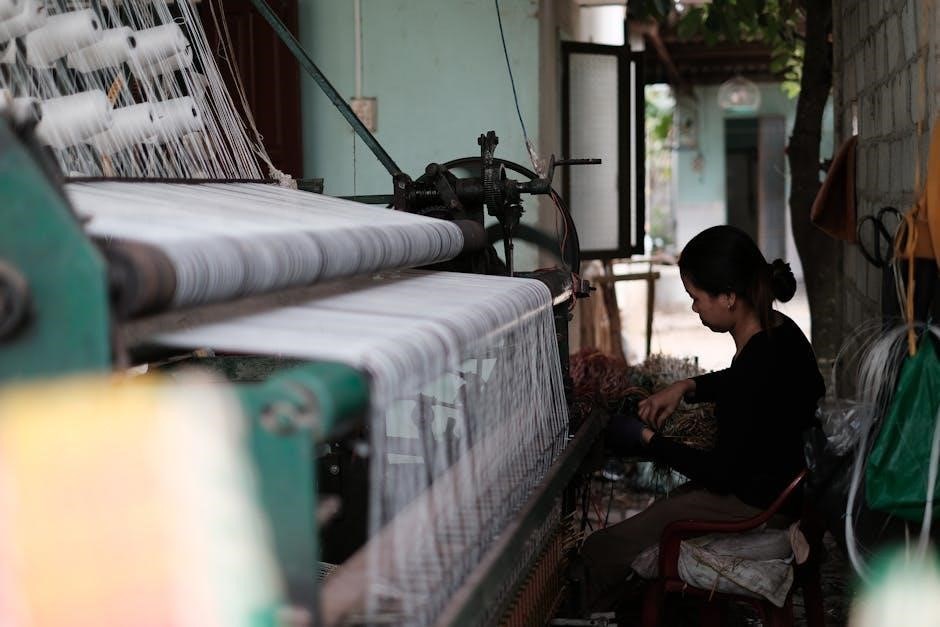
12.3 Floor Looms for Large-Scale Projects
Floor looms are ideal for large-scale weaving, offering durability and stability for extensive fabrics. They provide advanced features like multiple harnesses, enabling complex patterns and textures. While bulkier than table or frame looms, their power and precision make them perfect for creating professional-grade textiles, such as blankets, rugs, and decorative wall hangings, ideal for experienced weavers seeking high-quality results.
Resources for Further Learning
Explore online tutorials, e-courses, and YouTube videos for step-by-step weaving guides. These resources offer visual demonstrations and detailed instructions to enhance your weaving skills and creativity.
13.1 Online Tutorials and Guides
Discover a wealth of online tutorials and guides that offer step-by-step instructions for weaving. YouTube channels, blogs, and platforms like Skillshare and Craftsy provide detailed lessons. From warping techniques to basic weaving patterns, these resources cater to all skill levels. Many tutorials include video demonstrations, making it easier to follow along and master the craft; Explore specific guides for frame looms, tapestry weaving, and more to enhance your skills.
13.2 Books and Workshops for Weaver
Expand your weaving knowledge with books and workshops designed for weavers. Books like “The Weaver’s Handbook” offer in-depth guides on techniques and patterns. Workshops provide hands-on training, allowing you to learn directly from experts. These resources cover everything from basic warping to advanced designs, ensuring a comprehensive learning experience. They are perfect for refining your skills and exploring new creative possibilities in weaving.
Weaving is a rewarding craft that combines creativity and practicality. With practice, you’ll master the skills to create beautiful textiles. Keep experimenting and enjoying the journey!
14.1 Encouragement to Keep Practicing
Weaving is a rewarding journey that combines creativity and relaxation. Each project brings a sense of accomplishment and joy. Don’t be discouraged by initial challenges—practice builds skill and confidence. Start with small, simple designs to hone your techniques. Embrace the process, and remember, every weave tells a unique story. Happy weaving!
14.2 Final Tips for Enjoying the Weaving Journey
Embrace experimentation and creativity while weaving. Maintain consistent tension for even fabric, and don’t hesitate to explore new patterns. Portable looms allow you to weave anywhere, making it a meditative hobby. Celebrate small achievements and enjoy the therapeutic process of creating something handmade. Weaving is a journey of growth, so relax, have fun, and let your creativity shine!