hardie installation manual
This manual provides comprehensive guidance on installing Hardie products, emphasizing proper techniques, safety, and compliance with building standards for optimal durability and performance.
1.1 Overview of Hardie Products
Hardie products are renowned for their durability and versatility, offering a wide range of solutions for exterior and interior applications. From siding and ceilings to flooring, these products are designed to withstand harsh weather conditions and provide long-lasting performance. Made from high-quality, fiber-cement materials, they offer excellent resistance to fire, moisture, and pests. Their aesthetic appeal, combined with their robust construction, makes them a popular choice for both residential and commercial projects. This section provides an overview of the key Hardie products, highlighting their features and benefits for various installation scenarios.
1.2 Importance of Proper Installation
Proper installation of Hardie products is crucial to ensure their durability and performance. Incorrect methods can lead to warping, water damage, or structural issues. Adhering to the manufacturer’s guidelines ensures a secure and weather-tight seal, preventing costly repairs. Proper installation also maintains the product’s warranty, as deviations from recommended practices can void coverage. Additionally, it enhances safety by preventing potential hazards like fire risks or structural instability. By following the manual’s instructions, installers can achieve professional results, ensuring the product performs optimally for years to come and meets local building codes.
1.3 Safety Precautions
Always wear protective gear, including gloves, safety glasses, and a dust mask when handling Hardie products. Ensure proper ventilation to avoid inhaling dust during cutting. Use proper lifting techniques to prevent injury. Keep tools and materials away from children. Follow power tool safety guidelines to avoid accidents. Maintain a clean workspace to reduce tripping hazards. Regularly inspect tools for damage. Avoid installing in extreme weather conditions. Familiarize yourself with local safety regulations. Proper safety practices ensure a secure installation process and protect both installers and occupants. Always refer to the manual for specific safety recommendations;
Tools and Materials Required
Essential tools include a circular saw, drill, utility knife, and measuring tape. Materials needed are screws, sealants, weatherproofing compounds, and flashing for a secure installation.
2.1 Essential Tools for Hardie Installation
The installation of Hardie products requires specific tools to ensure precision and safety. A circular saw or miter saw is necessary for cutting panels accurately. A drill with carbide-tipped bits is recommended for pre-drilling holes to avoid cracking. Utility knives are useful for trimming and scoring panels. Measuring tapes and levels are essential for aligning and securing materials properly. Fasteners, such as galvanized or stainless steel screws, are critical for durable attachment. Sealants and weatherproofing materials are also necessary to maintain water resistance. Safety gear, including gloves and goggles, should always be worn during the process to protect against debris and dust.
2.2 Recommended Materials and Accessories
For a successful Hardie installation, use weather-resistant fasteners, such as galvanized or stainless steel screws, to prevent corrosion. Flashing and sealants are essential for waterproofing joints and seams. Joint tapes and membranes ensure airtight seals and protect against moisture. Spacing tools, like battens or furring strips, help maintain proper panel alignment and ventilation. Underlayment materials, such as plywood or oriented strand board (OSB), provide a stable base for installation. All materials should comply with local building codes and manufacturer specifications to ensure durability and performance. Proper accessories enhance the longevity and aesthetic appeal of Hardie products.
Preparation for Installation
Ensure the site is clean, level, and dry. Acclimatize Hardie products to ambient conditions. Verify measurements and layout, then unpack and organize materials for efficient installation.
3.1 Site Preparation and Cleanup
Begin by clearing the site of debris, ensuring a clean and level surface. Remove any existing materials that could hinder installation. Check for moisture and address any drainage issues to prevent water damage. Ensure the area is well-ventilated and free from obstructions. Properly dispose of waste materials and organize tools and supplies for efficient access. A well-prepared site minimizes delays and ensures a smooth installation process for Hardie products.
3.2 Acclimatization of Hardie Products
Acclimatization ensures Hardie products adapt to the installation environment. Store materials in the same conditions as the job site for 24–48 hours before installation. Maintain a consistent temperature between 18°C and 24°C to prevent warping or shrinkage. This step is crucial for maintaining product integrity and ensuring proper fit during installation. Failure to acclimatize may lead to installation issues like misalignment or buckling. Always follow manufacturer guidelines to achieve optimal results and extend the lifespan of your Hardie products.

Installation Process
The installation process involves a systematic approach to ensure proper fitting and alignment of Hardie products, adhering to manufacturer guidelines for a secure and durable finish.
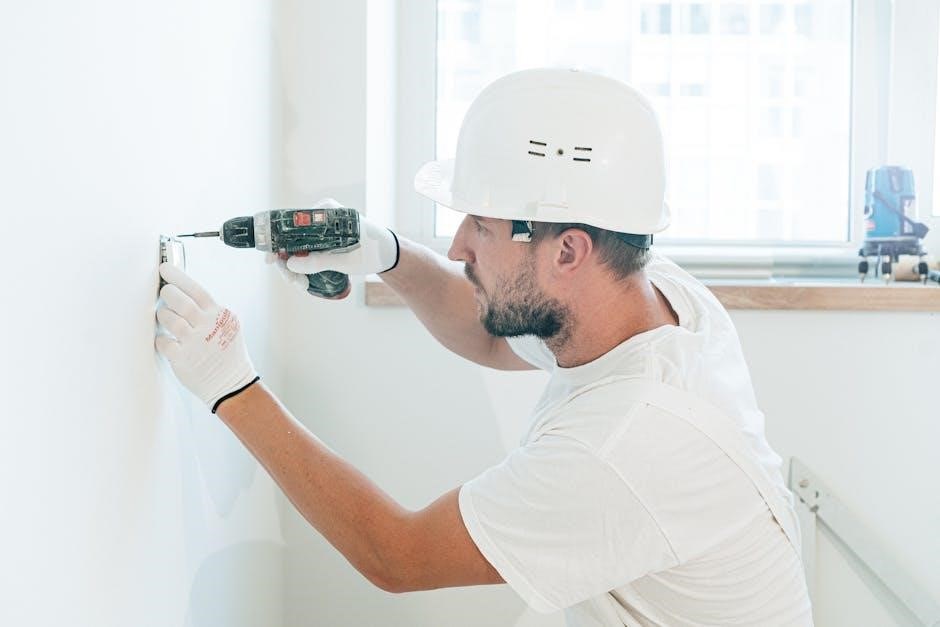
4.1 Wall Installation
Wall installation begins with ensuring the surface is clean, dry, and properly prepared. Hardie panels should be acclimatized to room temperature and handled with care to avoid damage. Start by installing the bottom row, aligning panels with a level and securing them with recommended fasteners. Maintain even spacing between fasteners to prevent warping. Each subsequent row should be staggered to avoid joint alignment, enhancing structural integrity. Use a rubber mallet to tap panels into place, ensuring tight fits. Regularly check alignment and spacing, leaving a small gap at joints for expansion. Finish by sealing edges and ensuring a flush, even surface.
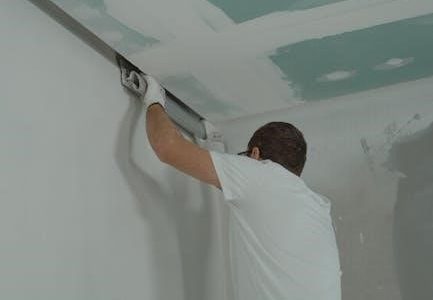
4.2 Ceiling Installation
Ceiling installation requires careful planning to ensure stability and a smooth finish. Begin by ensuring the ceiling surface is clean, dry, and structurally sound. Hardie panels should be acclimatized to room temperature before installation. Use a grid system or battens for support, spacing them evenly according to the manufacturer’s guidelines. Start by installing panels from the center outward to minimize cutting. Secure each panel with recommended fasteners, ensuring they are spaced evenly to avoid warping. Align panels precisely, checking with a laser level for straightness. Leave a small gap at joints for expansion and seal edges for a seamless finish. Regularly inspect alignment and spacing during installation.
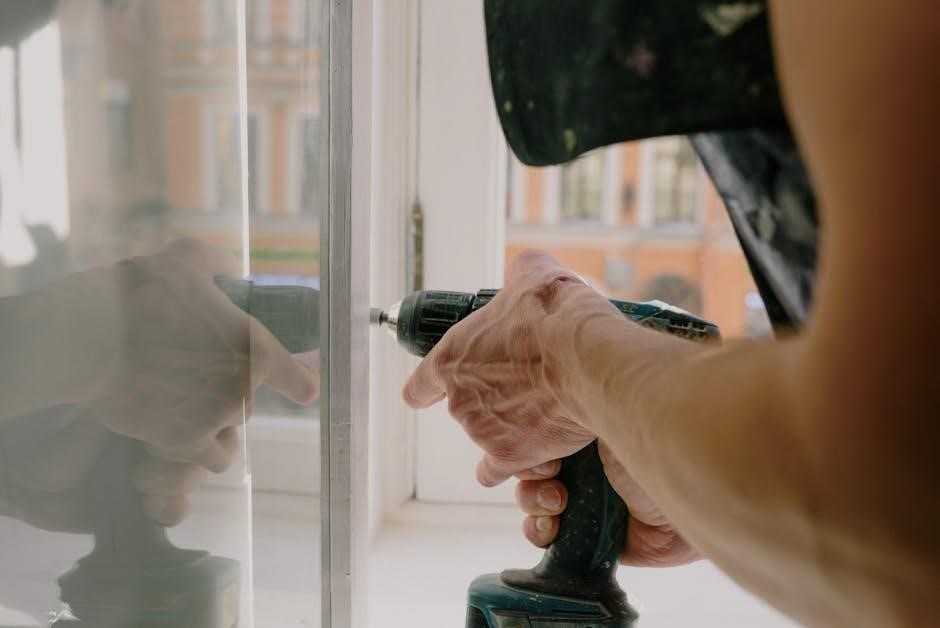
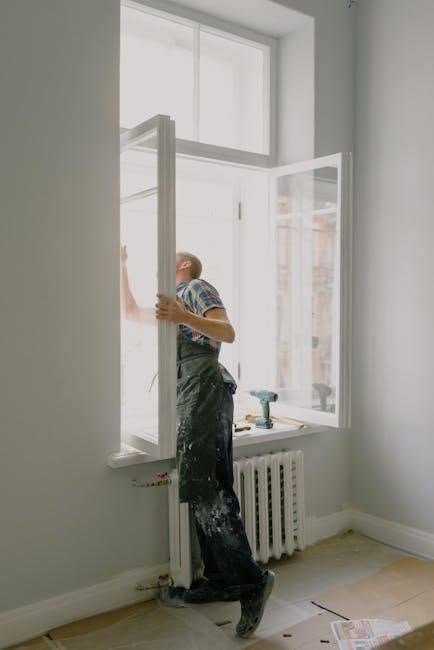
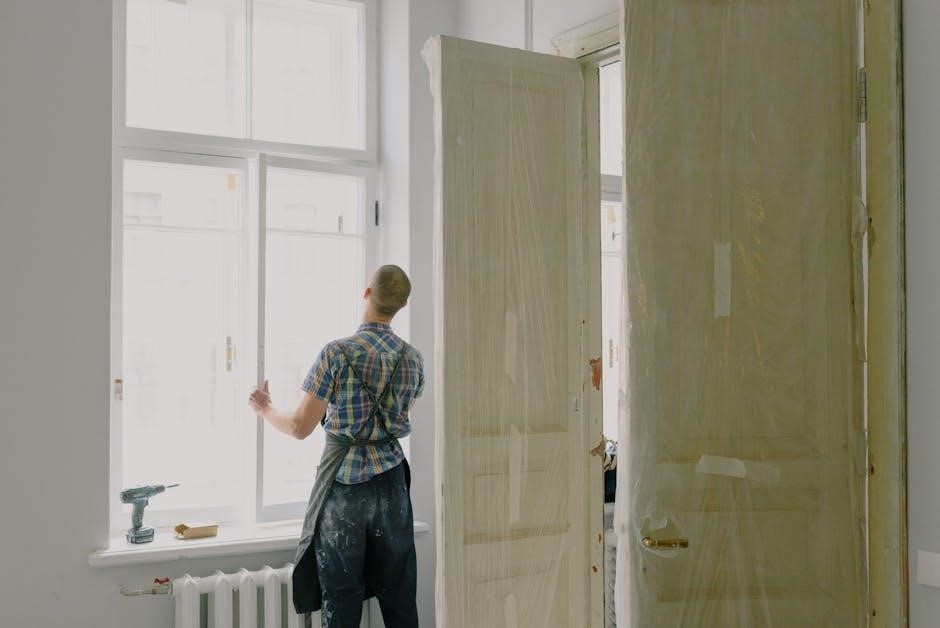
4.3 Installation Around Windows and Doors
Proper installation around windows and doors is crucial for both functionality and aesthetics. Begin by measuring and marking the areas around openings precisely. Cut Hardie panels to size using a circular saw or utility knife, ensuring smooth edges. Secure panels with flashing and weatherproof sealants to prevent water infiltration. Apply a bead of caulk around the perimeter of windows and doors before fitting the panels. Leave a small gap for expansion and fill with caulk after installation. Ensure panels align perfectly with frames for a seamless appearance. Double-check alignment and sealing with a level to guarantee straightness and weather-tightness. Refer to manufacturer guidelines for specific requirements.
4.4 Joint and Seam Management
Joint and seam management is vital for a durable and visually appealing installation. Begin by aligning panels carefully, ensuring joints are staggered to avoid weak points. Use H-clips or similar fasteners to secure panels, maintaining the recommended gap to allow for expansion. Apply a high-quality sealant to all seams and joints, especially in areas exposed to moisture. Wipe excess sealant immediately to prevent uneven finish. Ensure all fasteners are countersunk and filled to maintain a smooth surface. Regularly inspect and reseal joints as needed to maintain weather-tightness. Follow manufacturer guidelines for optimal results and longevity of the installation.
Finishing Touches
Apply paint or coatings according to manufacturer guidelines for a durable finish. Seal all edges and joints to ensure waterproofing and protect against weather conditions for long-lasting performance.
5.1 Painting and Coating
Painting and coating are crucial for enhancing durability and aesthetics. Use high-quality, acrylic-based paints specifically designed for fiber-cement surfaces. Ensure surfaces are clean, dry, and free from dust before application. Apply a primer if recommended for better adhesion and color retention. Use a sprayer or roller for even coverage, working in sections to avoid streaks. Allow each coat to dry completely according to the manufacturer’s instructions, typically 24 hours, before applying additional layers. Proper painting ensures the longevity and weather resistance of Hardie products, maintaining their appearance and structural integrity over time.
5.2 Sealing and Waterproofing
Sealing and waterproofing are essential to protect Hardie products from moisture damage. Apply a high-quality, waterproof sealant to all joints, seams, and edges. Use silicone-based sealants recommended for fiber-cement surfaces. Ensure surfaces are clean and dry before application. Follow the manufacturer’s instructions for drying times and application thickness. Regularly inspect and reapply sealants as needed, especially in areas exposed to heavy weather conditions. Proper sealing prevents water infiltration, ensuring the longevity and structural integrity of Hardie installations. This step is critical for maintaining the durability and appearance of the material over time.
Inspection and Quality Control
Inspection ensures compliance with installation standards, verifying proper techniques and material condition to maintain durability and performance.
6.1 Post-Installation Inspection Checklist
A thorough post-installation inspection ensures all components meet standards. Check alignment, fastening, and sealing. Verify no damage or gaps exist. Ensure compliance with manufacturer guidelines and local building codes for optimal performance and durability.
6.2 Addressing Common Installation Issues
Common issues like warping, gaps, or misalignments can arise. Inspect for proper acclimatization and fastening techniques. Use manufacturer-recommended sealants for gaps. Ensure panels are securely fastened to prevent warping. Address any damage promptly to maintain structural integrity and appearance. Always refer to the installation manual for specific solutions and guidelines to correct issues effectively and ensure long-term performance of Hardie products.
Maintenance and Repair
Regular inspections, cleaning, and prompt repair of damaged panels ensure longevity. Always use manufacturer-recommended materials and follow guidelines to maintain performance and appearance of Hardie products effectively.
7;1 Regular Maintenance Tips
Regular inspections and cleaning are essential to maintain Hardie products. Check for dirt, mildew, or damage and clean with mild detergents. Avoid abrasive materials to prevent scratching. Ensure proper ventilation to reduce moisture buildup. Inspect caulking and sealants around joints and edges, reapplying as needed. Trim nearby vegetation to prevent debris accumulation. Regularly check for wear and tear, especially in high-traffic areas. Use manufacturer-recommended materials for repairs. Schedule annual professional inspections to address potential issues early. Maintain records of maintenance activities for warranty compliance. Consistent upkeep ensures longevity and preserves the aesthetic appeal of Hardie installations.
7.2 Repairing Damaged Hardie Panels
Assess the damage to determine the appropriate repair method. Clean the affected area with mild detergent and water to remove dirt or debris. For minor cracks or holes, apply a fiber-cement patching compound, sanding smooth after drying. Replace severely damaged panels by cutting them out carefully and installing new ones, ensuring proper alignment and sealing. Use manufacturer-approved sealants to waterproof edges and joints. Paint the repaired area with compatible coatings to match the original finish. Always follow safety guidelines, such as wearing gloves and working on a stable surface. Addressing damage promptly prevents further deterioration and maintains the integrity of the installation.
Troubleshooting Common Problems
Identify and diagnose installation issues promptly. Refer to the manual for solutions, following manufacturer guidelines; Test repairs thoroughly and document findings for future reference.
8.1 Dealing with Warping or Buckling
Warping or buckling in Hardie panels often results from improper installation or environmental factors. Inspect the affected area to determine the cause. Ensure panels are securely fastened and spaced correctly. If warping occurs due to temperature changes, allow the material to acclimate. For severe cases, consult a professional to assess and correct the issue. Always follow manufacturer guidelines for repair to maintain product integrity and warranty validity. Regular inspections can prevent such issues from arising in the future.
8.2 Fixing Gaps and Misalignments
Gaps and misalignments in Hardie installations can compromise both appearance and functionality. Inspect the panels and substrate for unevenness or improper fastening. For small gaps, apply exterior-grade caulk to seal them effectively. Misalignments may require adjusting or replacing panels, ensuring proper spacing and alignment with surrounding materials. Always follow manufacturer guidelines for repair to maintain structural integrity. Regular inspections and addressing issues promptly can prevent further damage. If misalignments persist, consult a professional to ensure a lasting solution and uphold the product’s warranty and performance standards.
Warranty and Compliance
Hardie products are backed by a limited warranty ensuring defect-free materials. Compliance with local building codes and installation guidelines is mandatory to maintain warranty validity and ensure safety.
9.1 Understanding Warranty Terms
Understanding warranty terms is crucial for ensuring coverage and protecting your investment. Hardie products typically come with a limited warranty covering material defects and workmanship for a specified period. The warranty duration varies by product, with most lasting 20-30 years. Proper installation, adherence to guidelines, and regular maintenance are often required to maintain warranty validity. Failure to comply with these conditions may result in voiding the warranty. Review the terms carefully before installation to ensure all requirements are met. Keep records of installation and maintenance for potential warranty claims. Compliance ensures long-term performance and protection against defects.
9.2 Compliance with Local Building Codes
Compliance with local building codes is essential for a legally sound and safe installation. Hardie products must meet regional regulations, including fire resistance, structural integrity, and environmental standards. Verify requirements with local authorities before starting the project. Ensure materials are approved for your area and that installation methods align with code specifications. Non-compliance can result in fines, removal, or legal issues. Proper documentation and inspections may be required to confirm adherence. Always consult local building officials to verify compliance, as codes vary by region and are subject to updates. This ensures the installation is both safe and legally approved.
The Hardie Installation Manual provides a detailed guide to ensure successful and durable installations. By following the outlined steps, from preparation to finishing touches, users can achieve professional results. Proper safety measures, compliance with local codes, and regular maintenance are crucial for long-term performance. This manual serves as a valuable resource for both novices and experienced installers, emphasizing the importance of precision and adherence to best practices. Reviewing the manual thoroughly before starting your project will help ensure a flawless and enduring installation, maximizing the benefits of Hardie products for years to come.