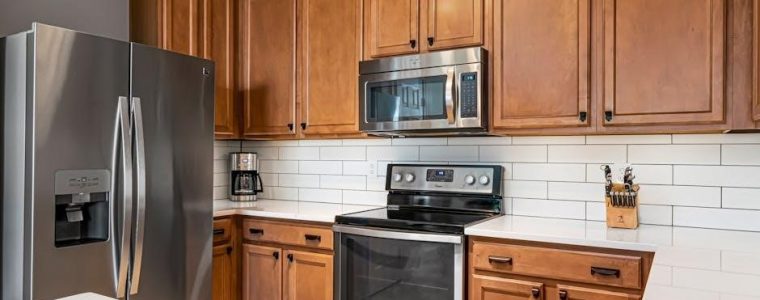
ge double oven self-clean instructions
The GE Double Oven Self-Clean feature offers a convenient and efficient way to maintain your oven’s cleanliness. Using high heat or steam‚ it breaks down food residue into ash‚ eliminating the need for harsh chemicals. This energy-efficient option ensures optimal performance while simplifying oven maintenance for a spotless kitchen.
Overview of the Self-Cleaning Function
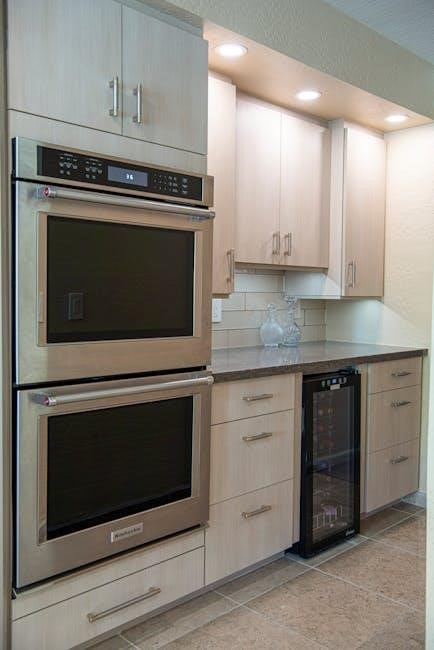
The GE Double Oven Self-Cleaning function uses high heat‚ up to 880°F‚ to decompose food residue into ash‚ eliminating the need for harsh chemicals. This energy-efficient process simplifies maintenance by transforming tough grime into a manageable residue that can be easily wiped away after cooling. Designed for convenience‚ the feature ensures optimal performance while maintaining a clean oven interior. It’s an innovative solution for busy homeowners seeking a hassle-free cleaning experience without compromising on results.
Benefits of Using the Self-Clean Option
Using the self-clean feature on your GE double oven offers numerous benefits. It eliminates the need for harsh chemicals‚ making the process safer and more environmentally friendly. The high-heat cycle efficiently breaks down tough food residue into ash‚ which can be easily wiped away after cooling. This feature saves time compared to manual cleaning and helps maintain your oven’s performance by removing grime that can affect heating efficiency. Additionally‚ it is energy-efficient and extends the lifespan of your oven by keeping it in optimal condition. Regular use ensures a cleaner‚ more hygienic cooking environment with minimal effort.
Preparing for the Self-Cleaning Cycle
Ensure the oven is cool‚ remove racks and accessories‚ and clear the interior of food residue before starting the self-cleaning process for optimal results.
Step 1: Cool Down the Oven
Always allow the oven to cool down completely before initiating the self-cleaning cycle. This ensures the process is safe and effective. GE recommends cooling the oven for at least 2 to 4 hours after the last use. A cool oven prevents any sudden temperature shocks and allows the self-cleaning function to operate efficiently. Once cooled‚ you can safely remove racks and prepare the oven for cleaning. Remember to use oven mitts or tongs when handling any components to avoid burns. Proper cooling is essential for a successful and damage-free self-cleaning experience.
Step 2: Remove Oven Racks and Accessories
Before starting the self-cleaning cycle‚ remove all oven racks‚ baking sheets‚ and accessories. This prevents damage from high temperatures and ensures proper cleaning. Use oven mitts or tongs to carefully lift and set racks aside. Also‚ take out any oven mats or liners‚ as these cannot withstand extreme heat. Store racks in a safe place to avoid accidental damage. If racks are too soiled‚ clean them separately with soap and water. Always refer to your GE manual for specific instructions on removable parts. Removing racks ensures a thorough cleaning and prevents potential hazards during the self-cleaning process.
Step 3: Empty the Oven Interior
After cooling and removing racks‚ thoroughly empty the oven interior. Scrape out large food particles using a soft brush or paper towels. Avoid using abrasive cleaners or harsh chemicals‚ as they can damage the finish. Wipe down surfaces gently to remove grease and debris. Ensure no metal utensils or foil are left inside‚ as they may cause damage during high heat. This step ensures the self-cleaning cycle works effectively. For tough residue‚ let the oven cool slightly before wiping. Properly preparing the interior guarantees optimal cleaning results and prevents potential damage or fumes during the cycle.
Operating the Self-Clean Cycle
Activate the self-clean mode via the control panel‚ select the desired duration‚ and let the oven use high heat to burn food residue into ash for easy cleanup.
Activating the Self-Clean Mode
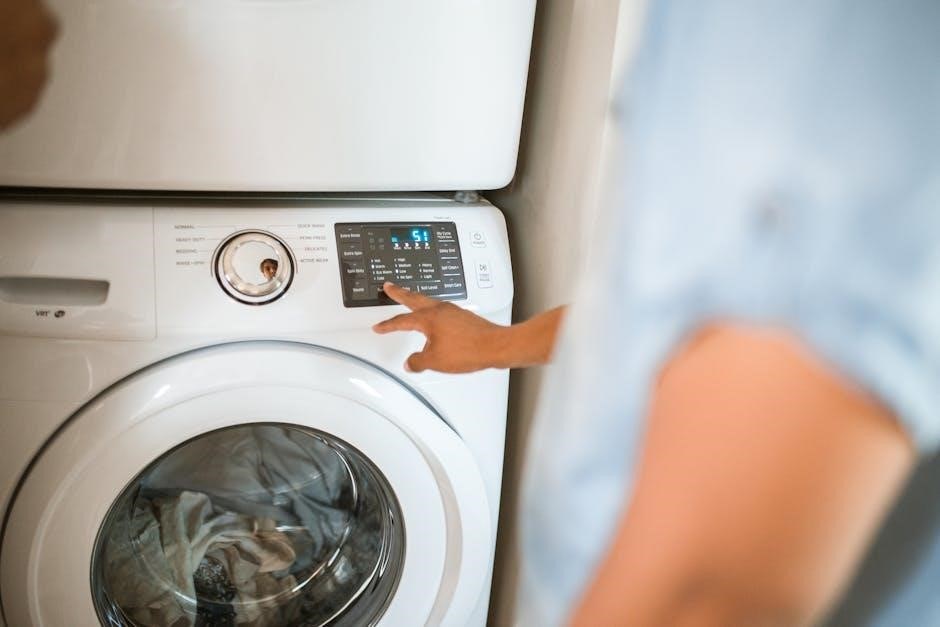
To activate the self-clean mode on your GE double oven‚ navigate to the settings on the control panel and select the self-clean option. Choose the desired cleaning duration‚ typically 2-4 hours‚ depending on soil level. Confirm your selection‚ and the oven will automatically lock and begin the high-temperature cleaning cycle. Ensure all racks and accessories are removed before starting. The oven door will remain locked until it cools down sufficiently after the cycle completes‚ ensuring safety. Always follow the manufacturer’s instructions for proper activation and operation.
Setting the Cleaning Duration
Setting the cleaning duration on your GE double oven is straightforward. Once in self-clean mode‚ use the control panel to select the desired cleaning time. Choose from preset options or adjust manually‚ typically ranging from 2 to 4 hours‚ depending on soil level. Light messes may require 2 hours‚ while heavy grime might need 4 hours. Ensure the oven door is closed and locked before starting. The duration you set determines the intensity of the cleaning cycle‚ balancing effectiveness with energy use. Always refer to your user manual for specific guidance to optimize cleaning efficiency and safety.

Understanding the High-Temperature Cleaning Process
The high-temperature cleaning process uses intense heat to break down food residue into ash. The oven heats to approximately 800°F to 1000°F‚ depending on the model‚ during the self-clean cycle. This extreme heat effectively vaporizes grime and tough stains‚ making cleanup easier afterward. The process is chemical-free‚ relying solely on heat to sanitize the interior. It’s essential to remove racks and accessories beforehand to prevent damage. The oven door locks during cleaning to ensure safety‚ and the exterior may become hot. Proper ventilation is recommended to avoid fumes. This method is efficient for deep cleaning but requires careful preparation and adherence to safety guidelines.

Safety Instructions for Self-Cleaning
Ensure the oven is empty‚ racks removed‚ and no flammable materials are nearby. Avoid opening the door during cleaning and keep children away. Proper ventilation is crucial to prevent fumes. Always use oven mitts when handling hot surfaces after cleaning.
- Wear oven mitts to protect hands from heat.
- Do not use the oven during the self-cleaning cycle.
- Keep children and pets away from the oven.
- Open windows for adequate ventilation to avoid fumes.
Precautions Before Starting the Cycle
Before initiating the self-cleaning cycle‚ ensure the oven is completely cool to avoid burns or damage. Remove all racks‚ trays‚ and utensils‚ as they may warp or discolor. Clean large food particles to prevent excessive smoke. Do not leave any aluminum foil or racks inside‚ as they can catch fire. Keep the oven door closed during the cycle to maintain high temperatures. Never use abrasive cleaners or scrubbers before the cycle‚ as residue can ignite. Ensure the oven is empty and free from flammable materials. Always follow the manufacturer’s guidelines to ensure safety and optimal performance.
- Ensure the oven is cool to the touch.
- Remove all racks‚ trays‚ and accessories.
- Clear large food debris to reduce smoke.
- Avoid using aluminum foil or metal utensils.
- Keep the oven door closed throughout the cycle.
Ventilation Requirements During Cleaning
Ventilation Requirements During Cleaning
Proper ventilation is essential during the self-cleaning cycle to remove fumes and odors. Open windows and doors to ensure good airflow. Turn on your kitchen exhaust fan to help circulate air and reduce smoke. Avoid inhaling fumes‚ as they may contain harmful particles. Keep pets and people‚ especially those with respiratory issues‚ away from the area. The oven’s high heat converts food residue to ash‚ but ventilation ensures a safer environment. Do not rely solely on air conditioning; natural ventilation is crucial. Maintain ventilation until the cycle completes and the oven cools slightly.
- Open windows and doors for airflow.
- Use the kitchen exhaust fan to reduce fumes.
- Keep the area clear of pets and people.
- Avoid inhaling fumes during the cycle.
- Ensure ventilation until cooling begins.
Important Safety Guidelines to Follow
Adhere to essential safety precautions when using the self-clean feature. Never start the cycle with food or utensils inside the oven. Avoid opening the oven door during cleaning‚ as extreme heat can cause burns. Keep children and pets away from the appliance. Do not use the oven for cooking during the self-cleaning cycle. Ensure the oven door is locked to prevent accidental opening. Always follow the manufacturer’s instructions to avoid damage or safety hazards. After the cycle‚ allow the oven to cool before cleaning. Never use abrasive cleaners or harsh chemicals‚ as they can damage the interior finish.
- Avoid opening the oven door during cleaning.
- Keep children and pets away from the oven.
- Ensure the oven door is locked during the cycle.
- Use a damp cloth for post-cycle cleaning.
- Avoid using abrasive cleaners or harsh chemicals.
Using the Steam Clean Option
The steam clean option provides a gentle‚ eco-friendly cleaning method. It uses steam to loosen food residue‚ requiring minimal effort and reducing harsh chemical use.
How Steam Cleaning Works
Steam cleaning uses water to create a steam cycle that loosens food residue inside the oven. Simply pour water into the oven bottom‚ then set the steam clean mode. The oven heats to generate steam‚ which softens tough stains and grime. This method is gentle on surfaces and avoids high temperatures‚ making it ideal for lighter messes. Steam cleaning is energy-efficient and eco-friendly‚ as it reduces the need for harsh chemicals. It’s a quick and effective way to maintain your oven’s cleanliness without the intense heat of traditional self-cleaning cycles.
Steps to Use the Steam Clean Function
To use the steam clean function on your GE double oven‚ start by ensuring the oven is cool. Pour 1-2 cups of water onto the bottom of the oven floor. Close the oven door and select the steam clean mode on the control panel. Set the duration based on the level of cleaning needed‚ typically 30 minutes to an hour. The oven will heat to produce steam‚ loosening food residue. After the cycle‚ let the oven cool slightly‚ then wipe down the interior with a damp cloth. This method effectively removes grime without extreme heat‚ keeping your oven clean and fresh.
Advantages of Steam Cleaning Over High Heat
Steam cleaning offers a gentler yet effective alternative to high-heat cleaning‚ preserving the oven’s finish and components. It uses water vapor to loosen grime‚ reducing the need for harsh chemicals. This method is energy-efficient‚ as it operates at lower temperatures than traditional self-cleaning cycles. Steam cleaning is also faster‚ typically requiring 30 minutes to an hour‚ compared to several hours for high-heat cycles. It’s eco-friendly and safer‚ minimizing strong fumes and odors. This approach is ideal for light to moderate soil‚ maintaining the oven’s performance without excessive wear.

Maintenance and Cleaning After the Cycle
Post-cycle maintenance ensures longevity and hygiene. Inspect for residue‚ wipe surfaces‚ and clean racks to prepare for future use. Regular upkeep prevents grime buildup effectively.
Allowing the Oven to Cool Down
After the self-clean cycle‚ allow the oven to cool completely before proceeding. This ensures safety and prevents accidental burns. The oven may remain hot for several hours‚ so plan accordingly. Avoid opening the oven door during the cooling process‚ as high temperatures can still pose a risk. Letting the oven cool down naturally also helps prevent damage to internal components. Once cooled‚ the oven lock will disengage‚ and you can safely wipe away ash and residue. For convenience‚ consider letting the oven cool overnight before final cleaning. Always prioritize safety when handling the oven post-cycle.
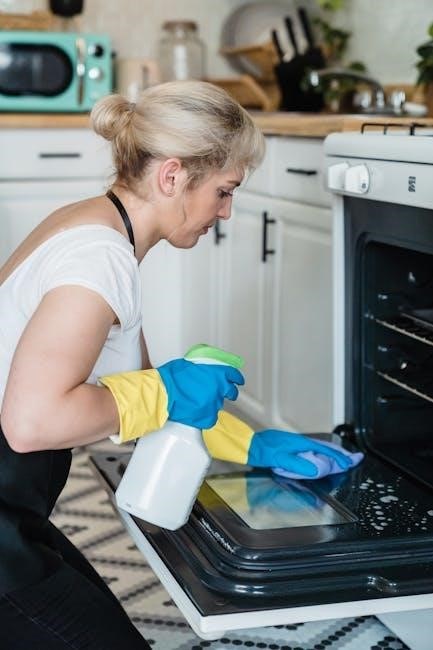
Wiping Away Ash and Residue
Once the oven has cooled‚ use a damp paper towel or soft cloth to wipe away ash and residue. Start from the top and work downward to prevent spreading debris. For tougher spots‚ a mixture of water and white vinegar can help loosen residue. Avoid using harsh chemicals or abrasive cleaners‚ as they may damage the oven’s finish. Wipe in the direction of the oven’s finish to maintain its appearance. Remove all ash and residue thoroughly‚ as leftover particles can burn during future use. After cleaning‚ wipe the oven dry to prevent streaks and ensure a spotless finish.
Cleaning the Oven Door and Exterior
After completing the self-clean cycle‚ clean the oven door and exterior to restore their appearance. Remove the door by detaching the hinges and set it aside. Wipe the door’s interior and exterior with a mixture of soap and warm water or a gentle cleanser. Avoid harsh chemicals or abrasive scrubbers‚ as they may damage the finish. For tough stains‚ let the solution sit before scrubbing lightly. Rinse thoroughly and dry with a soft cloth to prevent streaks. For the exterior‚ use a mild detergent and a damp cloth to remove fingerprints and splatters. Regular cleaning keeps the oven looking new and maintains its durability.
Troubleshooting Common Issues
Troubleshooting common issues during the self-clean cycle involves checking error codes‚ ensuring the oven is preheated‚ and verifying the door lock is functioning properly. Always consult the manual for specific solutions to address malfunctions effectively.
What to Do If the Self-Clean Cycle Doesn’t Start
If the self-clean cycle fails to start‚ ensure the oven is preheated to the correct temperature and the door is fully closed. Check for error codes and refer to the manual for their meanings. Verify that the oven lock is engaged properly‚ as this is essential for the cycle to begin. If issues persist‚ reset the oven by turning it off and on again. Ensure the child lock feature is not activated‚ as it can prevent the self-clean mode from starting. Always follow the manufacturer’s troubleshooting steps to resolve the issue effectively.
Addressing Error Codes During Cleaning
If error codes appear during the self-clean cycle‚ identify the specific code using the GE user manual. Common codes like “F30” or “F31” often relate to temperature sensor issues or control board problems. Reset the oven by turning it off and on‚ then retry the cycle. Ensure the oven door is fully closed and the lock is engaged. If the issue persists‚ check for loose connections or damaged sensors. Contact GE customer support for specialized assistance‚ as some errors may require professional repair. Always prioritize safety and follow manufacturer guidelines when addressing error codes during cleaning.
Resolving Issues with the Oven Lock
If the oven lock malfunctions during or after the self-clean cycle‚ ensure the oven is cool before troubleshooting. Check for proper alignment of the lock mechanism and clean any food residue that may block it. If the lock doesn’t engage‚ reset the oven by turning it off and unplugging it for 10 minutes. If the issue persists‚ inspect for damaged or worn-out lock components. Contact GE customer support for professional assistance‚ as internal repairs may be required. Never force the lock open‚ as this could damage the oven or pose safety risks. Always follow the manufacturer’s guidelines for resolving lock-related issues.

Frequently Asked Questions (FAQs)
Is the Self-Clean Feature Energy Efficient?
Yes‚ the self-clean feature is energy efficient‚ using high heat to burn food residue‚ reducing the need for harsh chemicals and excess energy.
Can I Use Harsh Chemicals with the Self-Clean Mode?
No‚ avoid harsh chemicals during self-clean cycles‚ as they can damage the oven’s finish or interfere with the high-heat cleaning process.
How Long Does a Typical Self-Clean Cycle Take?
A typical self-clean cycle takes 2–5 hours‚ depending on soil level and oven model‚ ensuring thorough cleaning without constant supervision.
The GE Double Oven self-clean feature is designed to be energy efficient. It uses high heat to burn food residue‚ reducing the need for harsh chemicals. While the cycle requires significant energy due to high temperatures‚ it is optimized to minimize excess consumption. The process targets tough stains and grime effectively‚ ensuring a clean oven with minimal waste. Modern models also offer shorter cycles for lighter messes‚ further enhancing efficiency. Overall‚ the self-clean feature balances powerful cleaning with energy-conscious operation‚ making it a practical choice for maintaining your oven.
Using harsh chemicals with the GE Double Oven’s self-clean mode is not recommended. The high-temperature cycle is designed to burn off food residue without the need for chemicals‚ and introducing them can lead to harmful fumes and potential damage to the oven’s interior. Chemicals may also react unfavorably with the heat‚ compromising safety and effectiveness. For tough stains‚ consider cleaning them manually with gentle cleansers or natural alternatives like baking soda and water after the self-clean cycle. Always follow manufacturer guidelines to maintain your oven’s performance and ensure a safe cleaning process.
A typical self-clean cycle for a GE double oven can last between 2 to 5 hours‚ depending on the level of cleaning needed. Light soil may take about 2 hours‚ while heavy soil can require up to 5 hours. The oven uses high heat to burn off residue‚ and the duration ensures thorough cleaning. After the cycle‚ allow the oven to cool before wiping away ash. The total time includes preheating‚ cleaning‚ and cooling phases. Always refer to your specific model’s guidelines for accurate timing‚ as variations may exist based on features and settings.
Additional Tips for Optimal Results
Regular maintenance‚ using appropriate tools‚ and preventing food residue buildup are essential for optimal self-cleaning results in your GE double oven. Follow these tips for better performance.
Regular Maintenance for Better Performance
Regular maintenance ensures your GE double oven performs optimally. Clean racks after each use to prevent food buildup. Wipe the oven floor regularly to avoid residue accumulation. Use the self-clean cycle based on soil levels for efficiency. Check and clean vent filters to maintain proper airflow. Avoid harsh chemicals‚ as they can damage finishes. Run the steam clean option periodically for light maintenance. Ensure the oven is cool before wiping down surfaces. These habits extend the lifespan of your oven and keep it functioning like new.
Using the Right Cleaning Tools
For effective cleaning of your GE double oven‚ use the right tools to avoid damage. Soft cloths or sponges are ideal for wiping surfaces. Microfiber cloths work well for dusting and polishing. Avoid abrasive scrubbers or metal scourers‚ as they can scratch the finish. For tough stains‚ mix baking soda and water to create a gentle paste. Apply it to stains‚ let it sit‚ then wipe clean. GE-recommended cleaning products ensure compatibility. Always avoid harsh chemicals or rough materials to maintain the oven’s appearance and functionality. Proper tools help preserve the oven’s condition and ensure long-term performance.
Preventing Food Residue Build-Up
To prevent food residue from building up in your GE double oven‚ adopt proactive cleaning habits. Line the oven floor with aluminum foil or a silicone mat to catch spills and splatters‚ making post-cooking cleanup easier. Cover dishes during cooking to minimize food particles from reaching the oven walls. Clean up spills promptly‚ preferably while the oven is still warm‚ using a damp cloth for easier removal of soft food residue. Avoid using abrasive cleaners that might damage the oven’s finish. Regularly wiping down surfaces and removing large food particles after each use ensures the self-clean feature works efficiently. Proper maintenance enhances oven performance and longevity.
The GE double oven self-clean feature offers an efficient and convenient way to maintain your appliance‚ ensuring optimal performance and a clean cooking environment always.
Final Thoughts on Using the Self-Clean Feature
The GE double oven self-clean feature is a powerful tool for maintaining your appliance. Regular use ensures a pristine interior‚ enhances cooking performance‚ and reduces food residue buildup. By following the manufacturer’s guidelines‚ you can maximize efficiency and safety. Remember to ventilate your kitchen properly during cycles and avoid harsh chemicals for optimal results. This feature not only saves time but also extends the lifespan of your oven. Always refer to your user manual for specific instructions tailored to your model. Proper maintenance and usage will ensure years of reliable service and satisfaction from your GE double oven.
Importance of Following Manufacturer Guidelines
Adhering to GE’s self-clean instructions ensures safety‚ efficiency‚ and optimal performance. Guidelines are designed to protect both the user and the appliance‚ preventing potential damage or hazards. Ignoring recommendations may void warranties or lead to malfunctions. Always follow temperature settings‚ cleaning durations‚ and ventilation requirements. Using unauthorized cleaning agents or deviating from instructions can harm the oven’s finish or functionality. Proper adherence ensures the self-clean feature works effectively‚ maintaining your oven’s longevity and reliability. By following the manufacturer’s advice‚ you guarantee a safe and efficient cleaning process that preserves your GE double oven’s performance for years to come.