gelish soft gel tips instructions
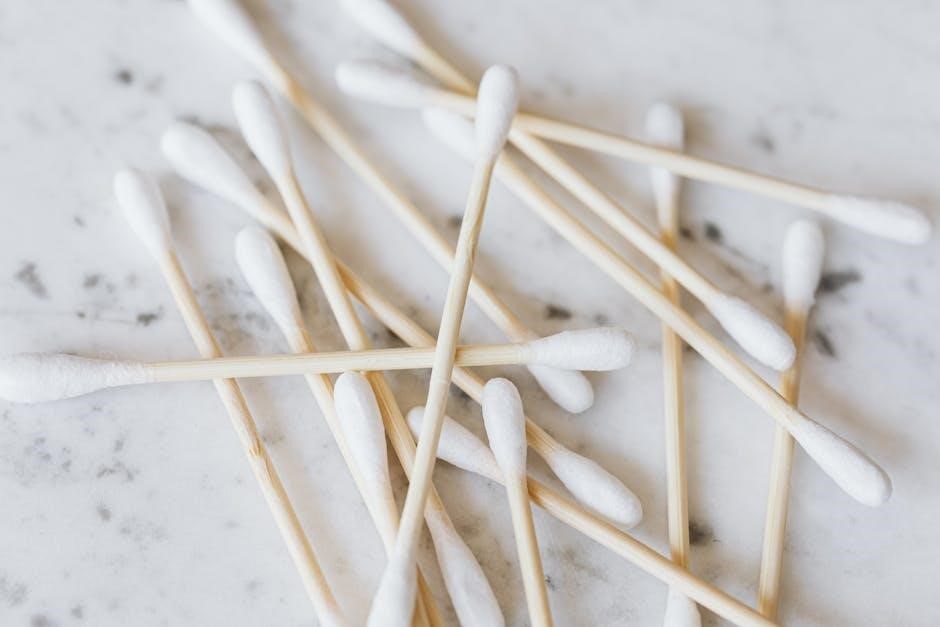
Gelish Soft Gel Tips are pre-shaped, flexible nail extensions offering a long-lasting solution. They combine gel’s durability with tip extensions, lasting up to 21 days without fills. Popular among professionals and at-home users for their ease of application and removal, these tips provide a salon-quality finish effortlessly.
What Are Gelish Soft Gel Tips?
Gelish Soft Gel Tips are pre-shaped, flexible nail extensions designed to enhance the natural appearance of nails. Made from a soft gel material, they are less damaging compared to traditional acrylics and offer a more natural feel. These tips are available in various shapes and sizes to suit different nail types and preferences. They are popular among both professionals and at-home beauty enthusiasts due to their ease of application and removal. Gelish Soft Gel Tips can be customized with gel polish and are known for their high-gloss finish and durability. They provide a salon-quality look without the need for extensive preparation or harmful chemicals, making them a convenient option for achieving beautiful, long-lasting nails.
Features and Benefits of Gelish Soft Gel Tips
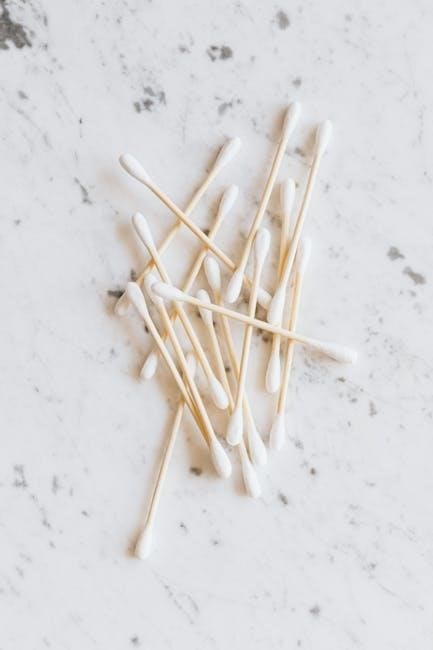
Gelish Soft Gel Tips are renowned for their flexibility and durability, offering a natural look and feel. They are lightweight and less damaging than traditional acrylics, making them ideal for delicate nails. These tips are odor-free and hypoallergenic, suitable for sensitive skin. Their high-gloss finish provides a salon-quality appearance, and they can be easily customized with gel polish. The soft gel material is resistant to chipping and cracking, ensuring long-lasting wear. Unlike rigid extensions, Gelish Soft Gel Tips move with the natural nail, reducing the risk of damage. They are also easy to remove without causing harm, making them a popular choice for those seeking a safe, stylish, and convenient nail enhancement solution.
Preparation for Application
Preparation involves cleaning, shaping, and ensuring nails are dry for optimal adhesion. Properly preparing the nail surface is crucial for a successful and long-lasting Gelish Soft Gel Tip application.
Nail Preparation Steps
Nail preparation is essential for a successful application. Start by cleaning the nail surface with a nail cleanser to remove oils and residue. Gently push back the cuticles using a cuticle pusher or orange stick. Shape the natural nail to fit the Soft Gel Tip using a nail file, ensuring a smooth edge. Buff the nail surface lightly to create a rough texture for better adhesion. Avoid over-filing, as this can weaken the nail. Wipe the nail with a lint-free wipe soaked in nail cleanser to remove any dust or debris. Finally, dehydrate the nail with a nail primer to ensure proper bonding between the nail and the Soft Gel Tip.
Choosing the Right Tip Size
Choosing the right tip size is crucial for a natural and comfortable fit. Start by measuring the width of your natural nail bed to select a tip that matches its curve and size. The tip should align with the edge of your natural nail, avoiding overlap or excessive overhang. Use a nail file to gently shape the tip if needed, ensuring it blends seamlessly with your natural nail. For a more precise fit, you can trim the tip before application. Avoid selecting a tip that is too small, as it may lift prematurely, or too large, as it may cause discomfort or damage. Proper sizing ensures durability and a polished appearance.
Cleaning and Dehydrating the Nail
Cleaning and dehydrating the nail are essential steps to ensure proper adhesion of the Gelish Soft Gel Tip. Use a lint-free wipe soaked in nail cleanser to thoroughly clean the natural nail surface, removing any oils, lotions, or residue. This step creates a clean canvas for the tip to adhere to. Next, apply a small amount of nail primer or dehydrator to the nail surface, gently wiping in one direction. This process removes moisture and further prepares the nail for bonding. Skipping this step can lead to lifting or separation of the tip. Allow the primer to fully dry before proceeding to ensure a strong and lasting bond.
Application Process
The application process involves applying adhesive, attaching the tip, shaping, and curing. Follow steps carefully for a secure, long-lasting bond.
Applying the Adhesive
Applying the adhesive is a critical step in ensuring a strong bond between the soft gel tip and your natural nail. Begin by cleaning and preparing the nail surface to remove any oils or residue. Gently wipe the nail with a lint-free wipe soaked in nail cleanser to create a clean canvas for the adhesive. Next, apply a small amount of primer to the natural nail to enhance adhesion. Using the adhesive specifically designed for Gelish Soft Gel Tips, carefully dot a thin layer onto the back of the tip and a small amount onto the natural nail. Avoid applying too much adhesive to prevent mess and ensure proper curing. Allow the adhesive to air dry for a few seconds or cure under a UV or LED light for a faster bond. Once set, proceed to attach the tip, ensuring it is centered and aligned properly for an even application. Be cautious not to get any adhesive on the cuticles or surrounding skin, as this can cause irritation or affect the tip’s adhesion. Proper application of the adhesive is essential for a secure, long-lasting finish.
Attaching the Soft Gel Tip
Once the adhesive is properly applied and cured, carefully attach the soft gel tip to your natural nail. Align the tip with the center of your nail to ensure a balanced fit. Gently press the tip onto the nail, starting at the center and moving outward to secure it in place. Make sure the tip is snug but not overly tight, as this can cause discomfort or lifting. Use a lint-free wipe to gently remove any excess adhesive that may squeeze out from under the tip. Hold the tip firmly for a few seconds to ensure it adheres correctly. For added security, cure the tip under a UV or LED light for the recommended time. Proper alignment and pressure are key to achieving a seamless look. Avoid touching the tip excessively, as oils from your skin can interfere with adhesion. Handling the tip gently during attachment helps prevent air bubbles or unevenness, ensuring a professional finish. Regularly check the tip after application to ensure it remains securely attached. Proper technique during attachment ensures a durable and long-lasting result. Avoid using harsh chemicals near the tip, as they may weaken the adhesive bond. Handling the tip with care during daily activities helps maintain its integrity and prevents premature lifting or damage. Regular maintenance, such as touch-ups or repairs, can extend the life of the soft gel tip. Following proper attachment techniques ensures a flawless and professional appearance. Always follow the manufacturer’s instructions for best results. Proper application and handling are essential for achieving the desired outcome. By adhering to these steps, you can enjoy beautiful, long-lasting nails with Gelish Soft Gel Tips. Always prioritize proper technique to ensure a secure and attractive finish. Regular practice will improve your skills in attaching the soft gel tips efficiently and effectively. Remember, patience and attention to detail are crucial for a successful application. Always maintain a clean and sanitized environment when working with Gelish products to prevent contamination and ensure optimal results. Properly attaching the soft gel tip is the foundation of a successful application, so take your time to get it right.
Shaping and Filing the Tip
After attaching the soft gel tip, use a nail file to shape it to your desired form. Start by gently filing the tip to blend it seamlessly with your natural nail. Use a medium-grit file to smooth out any ridges or excess gel, working in one direction only to avoid damaging the nail. Once shaped, switch to a fine-grit buffer to refine the surface, ensuring a smooth finish. Be careful not to file too aggressively, as this can weaken the tip. Lightly buff the edge where the tip meets your natural nail to create a natural-looking transition. This step ensures the tip looks like an extension of your own nail. Avoid filing in a back-and-forth motion, as it may cause lifting. Instead, work in a consistent direction to maintain the integrity of the tip. Proper shaping and filing are essential for achieving a professional and polished appearance. Always use high-quality nail files designed for gel and acrylics to prevent damage. By carefully shaping and filing the tip, you can customize the look to suit your preference while maintaining durability. Regular filing can help maintain the shape and prevent chipping. Remember to clean your tools after use to prevent cross-contamination. Shaping and filing are crucial steps in creating a flawless finish with Gelish Soft Gel Tips. Always take your time to ensure precision and a smooth result. Proper technique ensures the tip remains strong and visually appealing. Avoid over-filing, as it can lead to a weaker bond between the tip and your natural nail. Use a light touch and work gradually to achieve the desired shape. Filing is an art that requires patience, so practice makes perfect. This step is vital for achieving a natural, professional-looking finish. Always maintain a clean and organized workspace to ensure accuracy and safety during the process. Proper shaping and filing are the foundation of a long-lasting and attractive gel tip application. By mastering this step, you can enjoy beautiful, well-shaped nails with Gelish Soft Gel Tips. Always prioritize precision and care when handling nail files to avoid damaging the tip or your natural nail. This attention to detail ensures a durable and visually stunning result. Shaping and filing may seem tedious, but they are essential for achieving the perfect finish. Always follow the manufacturer’s guidelines for the best results. Proper filing ensures the tip adheres well and lasts longer. Invest in good-quality tools to make the process easier and more effective. With practice, shaping and filing will become second nature, allowing you to achieve salon-quality results at home. Always keep your tools clean and well-maintained to ensure optimal performance. Shaping and filing are key steps in creating a professional-looking nail enhancement. By following these steps carefully, you can enjoy beautiful, long-lasting nails with Gelish Soft Gel Tips. Always take your time and work with precision to achieve the best results. Proper shaping and filing ensure the tip looks natural and polished, making it a worthwhile investment of time. Always prioritize quality and attention to detail for a flawless finish. This step is where your creativity and skill come together to create a personalized look. Always remember, patience and precision are key to achieving a professional result. Shaping and filing are the final touches that bring your nail enhancement to life. Always strive for perfection in this step to enjoy stunning, long-lasting nails. Proper shaping and filing ensure the tip remains secure and visually appealing. Always use the right techniques to maintain the health and integrity of your nails. This step is where your hard work pays off, resulting in a beautiful, professional finish; Always take pride in your work and aim for excellence. Shaping and filing are the final steps in creating a masterpiece with Gelish Soft Gel Tips. Always remember, the finish is just as important as the application. Proper shaping and filing ensure the tip looks and feels natural. Always maintain a steady hand and work with care to achieve a flawless result. This step requires focus and attention to detail, but the outcome is well worth the effort. Always prioritize quality and precision when shaping and filing the tip. Proper technique ensures the tip lasts longer and looks better. Always follow the manufacturer’s instructions for the best results. Shaping and filing are essential steps that bring your nail enhancement to life. Always take your time and work carefully to achieve a professional finish. This step is where your creativity and skill shine, resulting in a beautiful, personalized look. Always remember, the finish is just as important as the application. Proper shaping and filing ensure the tip looks and feels natural. Always maintain a steady hand and work with care to achieve a flawless result. This step requires focus and attention to detail, but the outcome is well worth the effort. Always prioritize quality and precision when shaping and filing the tip. Proper technique ensures the tip lasts longer and looks better. Always follow the manufacturer’s instructions for the best results. Shaping and filing are essential steps that bring your nail enhancement to life. Always take your time and work carefully to achieve a professional finish. This step is where your creativity and skill shine, resulting in a beautiful, personalized look. Always remember, the finish is just as important as the application. Proper shaping and filing ensure the tip looks and feels natural. Always maintain a steady hand and work with care to achieve a flawless result. This step requires focus and attention to detail, but the outcome is well worth the effort. Always prioritize quality and precision when shaping and filing the tip. Proper technique ensures the tip lasts longer and looks better. Always follow the manufacturer’s instructions for the best results. Shaping and filing are essential steps that bring your nail enhancement to life. Always take your time and work carefully to achieve a professional finish. This step is where your creativity and skill shine, resulting in a beautiful, personalized look. Always remember, the finish is just as important as the application. Proper shaping and filing ensure the tip looks and feels natural. Always maintain a steady hand and work with care to achieve a flawless result. This step requires focus and attention to detail, but the outcome is well worth the effort. Always prioritize quality and precision when shaping and filing the tip. Proper technique ensures the tip lasts longer and looks better. Always follow the manufacturer’s instructions for the best results. Shaping and filing are essential steps that bring your nail enhancement to life. Always take your time and work carefully to achieve a professional finish. This step is where your creativity and skill shine, resulting in a beautiful, personalized look. Always remember, the finish is just as important as the application. Proper shaping and filing ensure the tip looks and feels natural. Always maintain a steady hand and work with care to achieve a flawless result. This step requires focus and attention to detail, but the outcome is well worth the effort. Always prioritize quality and precision when shaping and filing the tip. Proper technique ensures the tip lasts longer and looks better. Always follow the manufacturer’s instructions for the best results. Shaping and filing are essential steps that bring your nail enhancement to life. Always take your time and work carefully to achieve a professional finish. This step is where
Securing the Tip with Flash Curing
After shaping and filing, use a UV or LED light to flash cure the tip. This step ensures the adhesive bonds securely to your natural nail. Place your hand under the light for 30 seconds to set the gel without fully curing it. This brief exposure helps prevent lifting and strengthens the tip’s adhesion. Ensure the light is at the correct distance to avoid uneven curing. Proper flash curing creates a strong, durable bond between the tip and your nail. For best results, follow the manufacturer’s guidelines for curing time and intensity. This step is crucial for a long-lasting, professional finish. Always cure in a well-ventilated area and avoid overexposure to the light. Flash curing ensures the tip stays securely in place, providing a polished and professional appearance. It’s a quick but essential step in the application process. Always maintain the recommended curing time to achieve optimal results. This ensures the tip adheres properly and lasts longer. Flash curing is a critical step that should not be rushed or skipped. Always prioritize proper curing for a durable and attractive finish. By following these steps, you can enjoy a professional-looking result with Gelish Soft Gel Tips. Always keep the UV or LED light clean and at the correct settings for consistent results. Flash curing is a key step in securing the tip and ensuring its longevity. Always follow the manufacturer’s instructions for the best outcome. This step ensures the tip stays securely in place, providing a polished and professional appearance. It’s a quick but essential part of the application process. Always maintain the recommended curing time to achieve optimal results. Proper flash curing ensures the tip adheres properly and lasts longer. Flash curing is a critical step that should not be rushed or skipped. Always prioritize proper curing for a durable and attractive finish. By following these steps, you can enjoy a professional-looking result with Gelish Soft Gel Tips. Always keep the UV or LED light clean and at the correct settings for consistent results. Flash curing is a key step in securing the tip and ensuring its longevity. Always follow the manufacturer’s instructions for the best outcome. This step ensures the tip stays securely in place, providing a polished and professional appearance. It’s a quick but essential part of the application process. Always maintain the recommended curing time to achieve optimal results. Proper flash curing ensures the tip adheres properly and lasts longer. Flash curing is a critical step that should not be rushed or skipped. Always prioritize proper curing for a durable and attractive finish. By following these steps, you can enjoy a professional-looking result with Gelish Soft Gel Tips. Always keep the UV or LED light clean and at the correct settings for consistent results. Flash curing is a key step in securing the tip and ensuring its longevity. Always follow the manufacturer’s instructions for the best outcome. This step ensures the tip stays securely in place, providing a polished and professional appearance. It’s a quick but essential part of the application process. Always maintain the recommended curing time to achieve optimal results. Proper flash curing ensures the tip adheres properly and lasts longer. Flash curing is a critical step that should not be rushed or skipped. Always prioritize proper curing for a durable and attractive finish. By following these steps, you can enjoy a professional-looking result with Gelish Soft Gel Tips. Always keep the UV or LED light clean and at the correct settings for consistent results. Flash curing is a key step in securing the tip and ensuring its longevity. Always follow the manufacturer’s instructions for the best outcome.
Finishing Touches
Apply a thin base coat, cure under UV/LED light, then add 1-2 thin gel polish layers, curing each. Seal with a top coat and finish with cuticle oil.
Applying a Base Coat
After securing the soft gel tip, apply a thin layer of clear base coat to protect the nail and promote gel polish adhesion. Use a lint-free wipe to remove excess polish from around the cuticles. Ensure the base coat is evenly spread across the nail surface. Cure the base coat under a UV or LED light for the recommended time, typically 30 seconds to one minute. Avoid overloading the brush, as this can lead to uneven application. Once cured, the base coat will create a smooth canvas for the gel polish. Gently wipe the nail with a cleanser to remove any residue before moving to the next step.
Adding Gel Polish
Once the base coat is cured, select your desired Gelish gel polish color. Shake the bottle well and dip the brush into the bottle, wiping off excess polish on the rim. Paint a thin, even layer from the center of the nail to the tip, ensuring full coverage. Avoid pooling at the cuticles. Cure the first layer under a UV or LED light for the recommended time, usually 30 seconds to one minute. For a more vibrant look, repeat the process for a second layer. After curing, gently wipe the nail with a lint-free wipe and nail cleanser to remove any residue before proceeding to the top coat.
Sealing with a Top Coat
After applying the gel polish, finish by sealing with a thin layer of Gelish top coat. Using a clean brush, spread the top coat evenly across the nail surface, ensuring complete coverage from the center to the tip. Cure the top coat under a UV or LED light for the recommended time, typically 30 seconds to one minute. A thin layer is crucial to avoid pooling. Once cured, gently wipe the nail with a lint-free wipe and nail cleanser to remove any excess. This step not only adds a glossy finish but also protects the gel polish from chipping and fading, ensuring a long-lasting, professional result.

Tools and Materials Needed
To achieve professional results with Gelish Soft Gel Tips, essential tools include nail cleanser and primer, soft gel tip adhesive, UV or LED light, and nail files or buffers.
Nail Cleanser and Primer
Nail cleanser and primer are essential for preparing the nail surface before applying Gelish Soft Gel Tips. The cleanser removes oils, residue, and dirt, ensuring a clean canvas for adhesion. Using a lint-free wipe soaked in cleanser, gently swipe across each nail, avoiding the cuticles. This step prevents oils from interfering with the adhesive. After cleansing, the primer is applied to enhance adhesion and create a strong bond between the nail and the gel tip. It’s typically applied in a thin layer, allowed to dry completely before proceeding. Proper use of cleanser and primer ensures a long-lasting, durable finish, preventing lifting and promoting a flawless application.
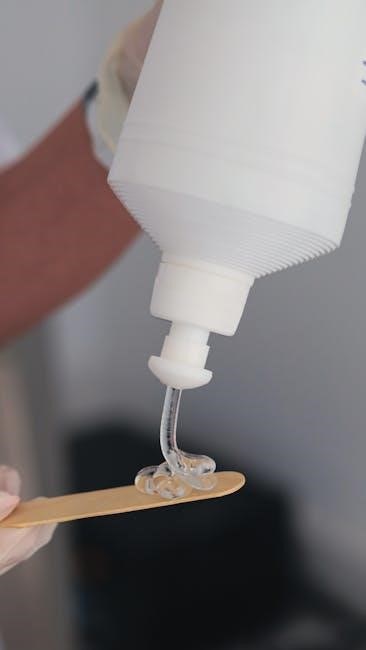
Soft Gel Tip Adhesive
The Soft Gel Tip Adhesive is a crucial component for securing Gelish Soft Gel Tips to your natural nails; It is specifically designed to create a strong, durable bond between the tip and the nail plate. The adhesive is typically cyanoacrylate-based, known for its quick-drying properties and long-lasting hold. When applying, a thin layer is sufficient to ensure proper adhesion without causing damage. Excess adhesive should be wiped away immediately to prevent pooling around the cuticles. Proper curing under a UV or LED light is essential to activate the adhesive and reinforce the bond. Using the right amount is key, as overuse can lead to lifting or unevenness. This adhesive is a must-have for a professional and long-lasting finish.
UV or LED Light for Curing
UV or LED lights are essential for curing Gelish Soft Gel Tips, as they activate the gel’s polymers to create a durable bond. UV lights emit ultraviolet radiation, while LED lights use specific wavelengths for faster curing. Both ensure the gel adheres properly to the nail and tip. It’s important to follow the manufacturer’s guidelines for curing times, typically 30 seconds to a minute, depending on the light’s intensity. Always wear protective eyewear during curing to avoid eye damage. Proper curing ensures a long-lasting, high-gloss finish and prevents lifting or separation. Inconsistent curing can lead to weak adhesion, so consistency is key for professional results.
Nail Files and Buffers
Nail files and buffers are essential tools for preparing and shaping the nail surface before applying Gelish Soft Gel Tips. Nail files are used to gently shape the natural nail and create a smooth edge, ensuring the soft gel tip adheres properly. Buffers are utilized to lightly buff the nail surface, removing ridges and creating a surface texture that enhances adhesion. Using the correct grit file (typically 100-150 grit) prevents damaging the nail. Proper filing and buffing techniques are crucial for a long-lasting application. Always clean and sanitize files and buffers between uses to maintain hygiene and prevent cross-contamination.

Tips for a Long-Lasting Finish
Avoiding Harsh Chemicals
Avoid exposure to detergents, sanitizers, or cleaning agents, as they can weaken the gel bond and cause the tips to lift prematurely over time.
Handling with Care
Wear gloves when doing chores or activities that involve water or heavy lifting to prevent chipping or cracking of the soft gel tips.
Regular Maintenance
Touch up the gel polish and reapply top coat every 7-10 days to maintain shine and prevent peeling, ensuring a durable and professional-looking finish.
Exposure to harsh chemicals can weaken the adhesion of Gelish Soft Gel Tips, leading to lifting and potential damage. Avoid using acetone-based products, strong detergents, or household cleaners, as they can degrade the gel and cause the tips to separate from the natural nail. Even mild or occasional exposure can compromise the longevity and integrity of your gel tips. Instead, opt for gentle nail cleansers and avoid submerging your hands in chemicals for extended periods. Regularly moisturizing your nails and cuticles can also help maintain their health and prevent damage. By avoiding harsh chemicals, you ensure your Gelish Soft Gel Tips last longer and remain in great condition.
To ensure the longevity of your Gelish Soft Gel Tips, it’s essential to handle them with care. Avoid using your nails as tools, such as opening packages or picking at things, as this can cause damage or lifting. Exposing your nails to harsh chemicals, like detergents or cleaning products, can weaken the adhesive bond. Wearing gloves when engaging in activities that involve water or chemicals can help protect your tips. Additionally, avoid excessive exposure to water, as it can soften the gel and loosen the tip. Gently pat your nails dry after washing hands or showering to prevent moisture buildup. Regular touch-ups can also maintain the appearance and integrity of your gel tips.
- Avoid harsh chemicals to prevent weakening the adhesive.
- Wear gloves during water-intensive tasks.
- Gently pat nails dry to avoid moisture buildup.
- Handle nails with care to prevent chipping or lifting.
By being mindful of these practices, you can enjoy a long-lasting, professional finish.
Regular maintenance is essential to extend the life of your Gelish Soft Gel Tips. Check the tips weekly for any signs of lifting or wear. Gently clean around the cuticles with a lint-free wipe and nail cleanser to prevent oil buildup; Moisturize your nails and cuticles with a nourishing oil to keep them healthy. Avoid exposing your nails to harsh chemicals or extreme temperatures, as this can weaken the adhesive. If you notice any lifting, apply a small amount of adhesive and cure it under the UV or LED light. Schedule regular touch-ups every two to three weeks to maintain a flawless appearance and prevent chipping or cracking.
Common Mistakes to Avoid
When applying Gelish Soft Gel Tips, common mistakes include incorrect tip sizing, which can lead to poor adhesion or discomfort. Insufficient curing time may result in a weak bond, causing tips to lift prematurely. Additionally, uneven application of adhesive or gel can create an unprofessional finish or compromise durability. Avoiding these errors ensures a long-lasting, flawless result.
Best Practices for Professionals
Incorrect Tip Sizing
Incorrect tip sizing is a common mistake that can lead to poor adhesion and an unprofessional finish. Choosing a tip that is too small or too large for the natural nail can cause lifting or uneven wear. It is essential to measure the natural nail carefully and select a tip that mirrors its shape and size. A tip that overlaps the natural nail or leaves excessive space can compromise the durability of the application. To avoid this, always try different sizes and ensure a snug, even fit before securing the tip with adhesive. Proper sizing ensures a seamless blend between the natural nail and the tip, promoting a long-lasting and polished result.