
honeywell th3210d1004 installation manual
The Honeywell TH3210D1004 is a non-programmable digital thermostat designed for heat pump systems‚ offering simple operation and compatibility with various HVAC setups for efficient temperature control․
1․1 Key Features of the Honeywell TH3210D1004
The Honeywell TH3210D1004 is a non-programmable digital thermostat designed for heat pump systems‚ offering precise temperature control and compatibility with 2 heat and 1 cool configurations․ It features a backlit digital display for easy readability‚ large buttons for simple navigation‚ and a compact design that fits seamlessly into any home decor․ This thermostat is energy-efficient and designed to work with various HVAC systems‚ providing consistent comfort․ Its user-friendly interface and straightforward installation make it a practical choice for homeowners seeking reliable temperature management without advanced programming options‚ ensuring effortless control over their heating and cooling needs year-round․
1․2 Compatibility and System Requirements
The Honeywell TH3210D1004 is designed to work with 2 heat and 1 cool configurations‚ making it ideal for heat pump systems․ It operates seamlessly with 24V HVAC systems and requires specific wiring to function properly․ Compatibility extends to various heating and cooling setups‚ ensuring efficient performance across different configurations․ Proper installation requires adherence to the wiring diagram provided in the manual to ensure all connections are accurate and safe․ This thermostat is a reliable choice for homeowners needing consistent temperature control with their heat pump systems today․
Pre-Installation Preparation
Before installing the Honeywell TH3210D1004‚ ensure you have all necessary tools and materials․ Review the wiring diagram and system requirements to confirm compatibility with your HVAC setup․ Prepare by turning off power to the system and understanding safety precautions to avoid any risks during the process․ Proper preparation ensures a smooth and safe installation experience․
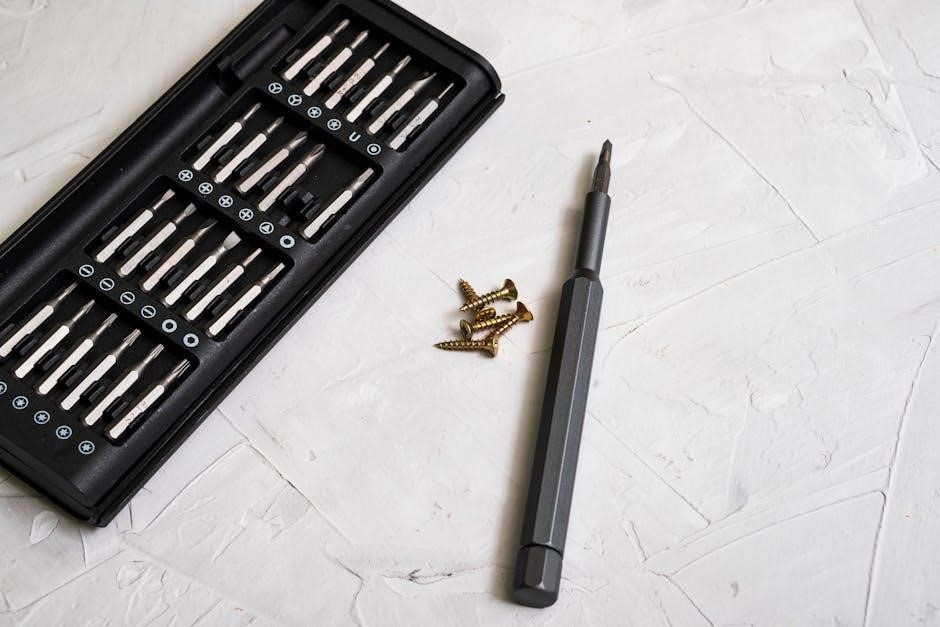
2․1 Tools and Materials Needed
To install the Honeywell TH3210D1004‚ you’ll need a few essential tools and materials; Start with a flathead or Phillips screwdriver for removing the old thermostat and mounting the new one․ Wire strippers may be necessary if you need to trim or expose wire ends․ A drill and wall anchors could be required for securing the thermostat mounting plate․ Additionally‚ a voltage tester is crucial to ensure the power to your HVAC system is off before starting․ Gather these items beforehand to streamline the installation process and ensure safety․ Always consult the manual for specific recommendations tailored to your system․
2․2 Understanding the Thermostat Wiring Diagram
Understanding the wiring diagram for the Honeywell TH3210D1004 is essential for a successful installation․ The diagram outlines the connections between the thermostat and your HVAC system‚ ensuring proper functionality․ Key terminals include R (24V power)‚ W (heat)‚ Y (cool)‚ and G (fan)․ The diagram also highlights auxiliary connections if required․ Always reference the wiring diagram provided in the manual to match your system’s specific setup․ Double-checking connections before powering up the system is crucial to avoid errors․ If you’re unsure‚ consulting a professional is recommended to ensure safe and correct installation․
2․3 Safety Precautions Before Starting the Installation
Before installing the Honeywell TH3210D1004‚ ensure the HVAC system’s power is turned off at the circuit breaker or fuse box․ Verify there is no power using a voltage tester․ Remove batteries from the old thermostat to prevent unexpected operation․ Label wires as you disconnect them to avoid confusion․ Wear safety glasses and insulated gloves for protection․ If you are unsure about any step‚ consult a licensed professional․ Never work on live electrical systems‚ as this can cause injury or damage․ Ensure the area is well-lit to clearly see all components․ Follow these precautions to ensure a safe and successful installation process․
Installation Steps
Turn off power‚ remove the old thermostat‚ and mount the new Honeywell TH3210D1004․ Connect wires to terminal designations‚ then restore power and test the system to ensure proper operation․
3․1 Turning Off the Power to the HVAC System
Before starting the installation‚ locate the circuit breaker or switch controlling the HVAC system and turn it off․ Verify the system is completely powered down to ensure safety during installation․
3․2 Removing the Old Thermostat
To remove the old thermostat‚ first‚ ensure the power to the HVAC system is off․ Gently pull the thermostat away from the wall to access the wires behind it․ Carefully disconnect the wires from their terminals‚ taking note of their connections for later reference․ If the thermostat is held in place by screws‚ remove them to free the device from the wall․ Once the old thermostat is detached‚ set it aside and prepare the area for the new installation․ Handle the wires with care to avoid damage or tangles during the process․
3․3 Mounting the New Thermostat
Mount the new Honeywell TH3210D1004 thermostat by aligning it with the existing wallplate or the one provided․ Use the screws from the old installation or the ones included in the package․ Center the thermostat on the wallplate to ensure proper alignment․ Gently push the device onto the wallplate until it clicks securely into place․ Tighten the screws without over-tightening to avoid damage․ Ensure the thermostat is level and the display is facing the correct direction for easy access․ Double-check the alignment before proceeding to connect the wires for optimal performance and accurate temperature sensing․
3․4 Connecting the Wires to the Terminal Designations
Connect the wires to the Honeywell TH3210D1004 thermostat by matching the terminal designations from your old system to the new thermostat․ Ensure the power is off before proceeding․ Align the wires with the appropriate terminals (e․g․‚ R‚ W‚ Y‚ G) based on the wiring diagram․ Secure the wires firmly to avoid loose connections․ If your system uses an “E” or “AUX” wire‚ ensure it is correctly connected for proper auxiliary heat operation․ Double-check the wiring configuration against the manual or manufacturer’s guidelines․ Test the HVAC system to confirm all functions work as expected after wiring completion․

Wiring and Terminal Designations
The Honeywell TH3210D1004 uses standard terminal designations (R‚ W‚ Y‚ G‚ etc․) for HVAC systems․ Correct wiring ensures proper functionality and safety‚ as outlined in the manual․
4․1 Understanding the Terminal Labels (R‚ W‚ Y‚ G‚ etc․)
The terminal labels on the Honeywell TH3210D1004 thermostat represent specific functions: R for 24V power‚ W for heating‚ Y for cooling‚ G for fan operation‚ and others like C for common․ Proper identification ensures correct wiring․ These labels align with standard HVAC wiring conventions‚ making installation straightforward․ Always refer to the manual or wiring diagram for precise connections to avoid system malfunctions․ Miswiring can lead to issues such as incorrect heating or cooling operation․ Ensure compatibility with your HVAC system’s terminal requirements for reliable performance․ This step is critical for safe and efficient thermostat installation․
4․2 Common Wiring Mistakes to Avoid
When installing the Honeywell TH3210D1004 thermostat‚ it’s crucial to avoid common wiring errors․ One frequent mistake is misidentifying terminal labels‚ such as confusing R‚ W‚ or Y wires‚ which can disrupt heating or cooling functions․ Always cross-reference the wiring diagram with your HVAC system to ensure correct connections․ Another error is not turning off the power to the HVAC system before starting‚ risking electrical hazards․ Additionally‚ improper wire gauge usage and mismatching wiring configurations for heat pumps versus standard systems can lead to malfunctions․ Finally‚ neglecting to test the system post-installation can result in undetected issues․ Double-checking each connection and testing functionality ensures safe and proper installation․
4․3 Special Considerations for Heat Pump Systems
When installing the Honeywell TH3210D1004 thermostat for heat pump systems‚ ensure proper configuration of the O/B terminal for auxiliary heating or cooling․ Miswiring this terminal can lead to incorrect system operation․ Always verify the heat pump’s wiring diagram to match the thermostat’s terminal designations․ Additionally‚ check if the system requires a two-stage setup‚ as the TH3210D1004 supports two-stage heat pumps․ Improper wiring can cause the heat pump to malfunction or fail to switch modes․ Follow the manufacturer’s guidelines to prevent issues and ensure efficient operation․ Always double-check connections before powering up the system․
Post-Installation Setup
After installation‚ configure the thermostat’s initial settings‚ set temperature ranges‚ and test the HVAC system to ensure proper operation and functionality․
5․1 Configuring the Initial Settings
After installation‚ access the thermostat’s setup menu to configure initial settings․ Select options like Fahrenheit or Celsius‚ and adjust the temperature swing to your preference․ Ensure the equipment type matches your HVAC system‚ such as heat pump or conventional․ Set the fan operation to auto or on‚ depending on your needs․ Some models may require setting the installer options‚ such as heat pump configuration or auxiliary heat settings․ Save your preferences to complete the setup․ These settings ensure the thermostat operates efficiently and aligns with your system’s capabilities for optimal performance and energy savings․
5․2 Setting Up the Temperature Range
After initial setup‚ configure the temperature range to match your comfort preferences․ Set the minimum and maximum temperatures for both heating and cooling modes․ For heat pump systems‚ ensure the balance point is correctly set to avoid unnecessary auxiliary heat usage․ Adjust the temperature differential to minimize frequent cycling of your HVAC system․ Save your settings to lock in your preferred range․ Proper temperature range setup ensures efficient operation and maintains consistent comfort levels in your home․ Heat Pump Systems may require additional adjustments to optimize performance․ Always refer to the manual for specific instructions tailored to your system type․
5․3 Testing the HVAC System After Installation
After completing the installation‚ turn the power back on and test the HVAC system thoroughly․ Set the thermostat to heat mode and ensure it activates the heating system․ Repeat this process for cool mode to confirm proper operation․ Check the fan mode to ensure the blower operates correctly․ Verify smooth transitions between heating and cooling modes‚ especially for heat pump systems; Monitor the temperature display to ensure it accurately reflects the room temperature․ If any issues arise‚ refer to the troubleshooting section in the manual․ Proper testing ensures the system operates efficiently and meets your comfort needs․ Always verify functionality before finalizing the setup․
Maintenance and Troubleshooting
Regularly clean the thermostat and check batteries for optimal performance․ Troubleshoot issues like incorrect wiring or power outages․ Refer to the manual for detailed solutions․ Ensure system reliability․
6․1 Cleaning and Maintaining the Thermostat
Regular maintenance ensures the Honeywell TH3210D1004 operates efficiently․ Clean the thermostat with a soft‚ dry cloth to remove dust and debris․ Avoid harsh chemicals or liquids․ Check the battery compartment for corrosion and ensure batteries are securely installed․ If the display dims or malfunctions‚ replace batteries promptly․ For non-battery models‚ verify wiring connections are tight․ Power cycle the thermostat by turning it off and on to reset internal functions․ Clean the sensors periodically to maintain accurate temperature readings․ Refer to the manual for detailed maintenance instructions to prolong the thermostat’s lifespan and performance․
6․2 Common Issues and How to Resolve Them
Common issues with the Honeywell TH3210D1004 include incorrect wiring‚ display malfunctions‚ or unresponsive controls․ Verify wiring connections match the terminal designations․ If the display doesn’t turn on‚ check power sources and batteries․ For temperature inaccuracies‚ ensure sensors are clean and properly calibrated․ If the thermostat is unresponsive‚ reset it by turning off power‚ waiting 30 seconds‚ and restarting․ Addressing these issues promptly ensures optimal performance․ Always refer to the manual for troubleshooting steps or contact Honeywell support for advanced assistance to resolve persistent problems effectively and maintain system efficiency․
6․3 Battery Replacement (if applicable)
If your Honeywell TH3210D1004 thermostat requires batteries‚ replacement is straightforward․ Turn off the power to the HVAC system before starting․ Remove the thermostat faceplate to access the battery compartment․ Replace the old batteries with new ones of the correct type‚ ensuring proper polarity․ Reattach the faceplate and restore power․ If your model doesn’t use batteries‚ skip this step․ Always refer to the manual for specific instructions‚ as some models may vary․ Proper battery maintenance ensures reliable performance and avoids system malfunctions․ Dispose of old batteries safely and test the thermostat afterward to confirm functionality․
After completing the installation‚ verify all settings and ensure the HVAC system operates correctly․ Check for proper temperature regulation and energy efficiency to confirm successful setup․
7․1 Verifying Proper System Operation
After installation‚ ensure the Honeywell TH3210D1004 thermostat operates correctly․ Turn the HVAC system on and off to check responsiveness․ Verify heating and cooling modes function as expected; Adjust the temperature settings to confirm accurate temperature control․ Ensure the fan operates according to the selected settings․ Check for any unusual noises or malfunctions․ If the system does not respond‚ review wiring connections and settings․ Proper operation ensures comfort and energy efficiency‚ so double-check all functions before finalizing the setup․
7․2 Ensuring Energy Efficiency
To maximize energy efficiency with the Honeywell TH3210D1004‚ set moderate temperature ranges and avoid extreme settings․ Use the system mode switch to select heat‚ cool‚ or fan-only operation based on seasonal needs․ Regularly clean the thermostat and ensure proper installation to maintain accuracy․ Check wiring connections for secure fits to prevent energy-wasting malfunctions․ Adjust settings to align with your schedule and preferences for optimal performance․ Proper setup and maintenance ensure the thermostat operates efficiently‚ saving energy and reducing utility costs while maintaining comfort․