marie callender pie crust baking instructions
Welcome to the world of delicious pie crust baking with Marie Callender! This guide will walk you through the process of creating perfect, flaky crusts every time. Whether you’re a novice or an experienced baker, Marie Callender’s pie crusts offer convenience and exceptional taste. Explore the basics, advanced techniques, and troubleshooting tips to ensure your baking success.
Overview of Marie Callender Pie Crust
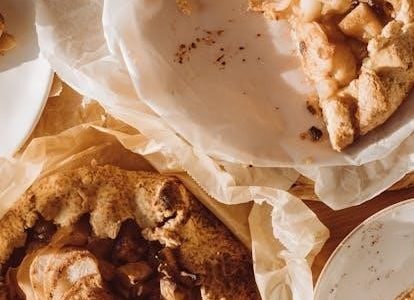
Marie Callender Pie Crusts are renowned for their convenience, offering a buttery, flaky texture perfect for sweet or savory pies. Pre-made for effortless baking.
History and Popularity
Marie Callender’s pie crusts have a long-standing reputation for quality and flavor. Founded in the 1940s, Marie Callender’s began as a small bakery in California, quickly gaining fame for its homemade-style pies. Over the years, the brand expanded its product line to include pre-made pie crusts, making it easier for home bakers to achieve professional results. The crusts are known for their flaky, buttery texture and are made with high-quality ingredients. Their popularity stems from their convenience and consistent taste, making them a favorite for both novice and experienced bakers. Whether for sweet or savory pies, Marie Callender’s crusts have become a trusted choice, offering a hassle-free way to create delicious desserts and meals.
Ingredients and Nutritional Information
Marie Callender’s pie crusts are crafted with simple, high-quality ingredients, including wheat flour, vegetable shortening, water, and salt. These components ensure a flaky and tender texture. Each crust contains no artificial flavors or colors, making it a wholesome option for home bakers. Nutritional information per serving includes approximately 250 calories, 12g of fat, 560mg of sodium, and 25g of carbohydrates. They are also free from trans fats, appealing to health-conscious consumers. The crusts are versatile, suitable for both sweet and savory fillings, and their pre-made convenience allows for quick meal preparation without compromising on taste or quality. This balance of simplicity and nutrition has made Marie Callender’s a preferred choice for many pie enthusiasts.
Baking Process
The baking process involves preheating the oven to 400°F, thawing the crust for 10 minutes, pricking the bottom and sides, and baking for 12-15 minutes until golden for a golden finish.
Preheating the Oven
Preheating the oven is a crucial step in ensuring your Marie Callender pie crust bakes evenly. According to the instructions, set your oven to 400°F (200°C) for conventional baking. This temperature ensures the crust cooks properly without burning. While preheating, place the oven rack in the center to allow for consistent heat distribution. If you’re using a convection oven, you may need to adjust the temperature slightly, typically reducing it by 25°F (15°C) for even cooking. Proper preheating helps the crust rise and set quickly, contributing to a flaky and golden texture. Always preheat your oven for at least 10-15 minutes before placing the pie crust inside to ensure it reaches the desired temperature. This step is essential for achieving the best results with Marie Callender pie crusts.
Thawing the Pie Shell
Thawing the Marie Callender pie shell is a simple process that ensures even baking. Remove the frozen shell from the freezer and let it thaw at room temperature for about 10 minutes. This allows the dough to soften slightly, making it easier to handle. Once thawed, use a fork to prick the bottom and sides of the crust thoroughly. This step prevents air bubbles from forming during baking and helps the crust cook evenly. Avoid thawing the shell in the microwave, as it can cause uneven softening or even melt the butter in the dough. Proper thawing ensures the crust retains its flaky texture and bakes to a golden perfection. Always handle the thawed crust gently to prevent stretching or tearing the dough.
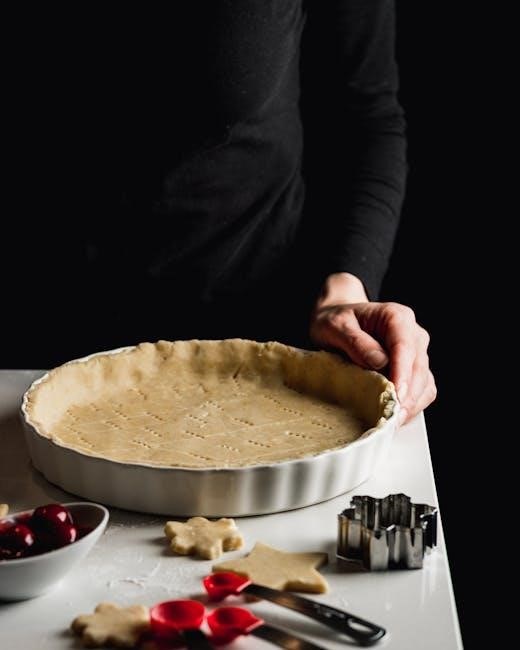
Pricking the Crust
Pricking the crust is a simple yet crucial step in ensuring your Marie Callender pie crust bakes evenly. After thawing the pie shell, use a fork to prick the bottom and sides thoroughly. This process, known as “docking,” prevents air bubbles from forming during baking, which can cause the crust to puff unevenly or even crack. Be sure to prick deeply but gently to avoid tearing the dough. Proper pricking ensures the crust lies flat and cooks uniformly. For best results, prick the crust in a consistent pattern, covering the entire surface. This step is especially important for blind baking, as it helps the crust hold its shape without filling. Remember, thorough pricking is key to achieving a perfectly baked crust every time.
Baking the Shell
Baking the Marie Callender pie shell is a straightforward process that requires attention to detail for optimal results. Preheat your oven to 400°F (200°C) and place the pie shell on a baking sheet in the center of the oven. Bake for 12 to 15 minutes, or until the crust is golden brown. Ensure the shell is pricked thoroughly before baking to prevent air bubbles. For an evenly cooked crust, avoid opening the oven door too early. If blind baking, follow the same temperature and time guidelines. The shell should be lightly golden and firm to the touch when done. Proper baking ensures a crisp, flaky texture that complements any filling; Always refer to the package instructions for specific baking times, as they may vary slightly. A well-baked shell is the foundation of a perfect pie.
Blind Baking Instructions
Blind baking is essential when using a filling that doesn’t require cooking, like cream or pudding. To ensure a crisp crust, preheat your oven to 375°F (190°C). Place the thawed pie shell on a baking sheet lined with parchment paper. Cover the crust with parchment paper or aluminum foil, weighting it down with pie weights or dried beans to prevent puffing. Bake for 12-15 minutes, then remove the weights and parchment. Continue baking for an additional 5-7 minutes, or until the crust is lightly golden. Avoid over-baking to maintain tenderness. Once done, allow the crust to cool slightly before adding your filling. This method ensures a perfectly baked shell ready for your favorite fillings. Always follow package guidelines for precise instructions, as baking times may vary slightly. Proper blind baking is key to achieving a professional-quality pie.
Filling and Baking the Pie
Filling and baking your Marie Callender pie crust is straightforward. Choose your desired filling, pour it into the pre-baked shell, and bake at 375°F until the crust is golden and the filling is set, typically 40-50 minutes. Ensure even heating for a perfectly cooked pie. Always follow specific filling instructions for best results. Proper baking ensures a delicious, flaky crust every time. Use a baking sheet for stability and watch for golden edges to avoid over-baking. Perfect for sweet or savory creations, Marie Callender crusts deliver consistent quality with minimal effort. Enjoy your homemade masterpiece with ease and confidence.
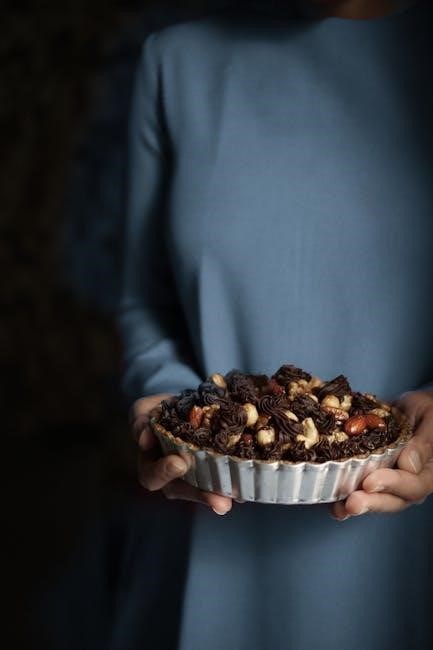
Choosing the Right Filling
Selecting the perfect filling for your Marie Callender pie crust is essential for a delicious outcome. Whether you prefer sweet treats like apple, cherry, or pumpkin, or savory options such as chicken pot pie or quiche, the right filling complements the crust’s buttery flavor. Consider the texture and moisture content of your filling, as this affects baking time and crust integrity. For sweet pies, a balance of sugar and spices ensures flavor harmony. Savory fillings require seasoning adjustments to avoid overpowering the crust. Always prepare your filling according to recipe guidelines to maintain consistency. Additionally, pre-cook fillings if necessary to prevent sogginess and ensure even baking. Matching the filling to the crust’s flaky texture guarantees a mouthwatering result. Explore various recipes to find your perfect pie combination.
Filling the Pie Crust
Filling your Marie Callender pie crust is a straightforward process that requires careful attention to detail. Start by ensuring the crust is completely thawed and placed on a baking sheet for stability. Gently pour or spoon your prepared filling into the center of the crust, spreading it evenly to avoid air pockets. Be careful not to overfill, as this can cause leakage during baking. For sweet pies, ensure the filling is evenly distributed to balance flavors. For savory pies, like chicken pot pie, spread the filling smoothly to cover the entire crust. Lightly press the edges of the crust to seal if necessary, especially for double-crust pies. Avoid stretching or pulling the crust, as this can lead to uneven baking. Once filled, proceed to bake according to the specific filling’s instructions for a perfectly cooked pie. Always refer to the filling recipe for precise measurements and preparation tips. Proper filling ensures a delightful texture and flavor combination every time. Follow these steps to achieve a professional-looking and tasting pie. Always handle the crust gently to maintain its flaky texture and structure. Baking the filled pie requires attention to temperature and time, so double-check your oven settings before placing the pie inside. Use parchment paper or a silicone mat to prevent sticking and simplify cleanup. For blind baking, ensure the crust is weighed down with pie weights or beans to maintain its shape. Avoid overfilling, as this can lead to a messy oven and uneven cooking. Keep an eye on the pie during the baking process to ensure the crust doesn’t burn or the filling doesn’t bubble over excessively. Adjust the baking time as needed based on the filling type and crust color. Proper filling and baking techniques guarantee a perfect pie every time, whether sweet or savory. Always let the pie cool slightly before serving to allow the filling to set and the crust to retain its structure. Cooling also helps prevent the crust from becoming soggy. Use a wire rack for cooling to ensure air circulates evenly around the pie. Experiment with different fillings and baking techniques to find your favorite combinations. Remember, practice makes perfect, so don’t be discouraged if your first attempts don’t turn out as expected. With time and experience, you’ll master the art of filling and baking Marie Callender pie crusts like a pro.
Baking the Filled Pie
Once your pie is filled, place it on a preheated baking sheet in the center of the oven for even cooking. Preheat your oven to 400°F (200°C) for most fillings, though this may vary depending on the recipe. Bake the pie for 40 to 50 minutes, or until the crust is golden brown and the filling is bubbly. For pies like apple or pumpkin, the filling should be set and slightly caramelized. Monitor the crust during baking to ensure it doesn’t burn; if the edges brown too quickly, cover them with foil for the remaining baking time. Adjust the baking time based on the filling type, as cream or meringue pies may require shorter durations. After baking, let the pie cool on a wire rack for at least 30 minutes to allow the filling to set before serving. Always refer to specific filling instructions for precise baking times. Proper baking ensures a perfectly cooked crust and filling combination. Avoid opening the oven too early, as this can cause the pie to sink or the filling to spill. Use a food thermometer if needed to check the internal temperature of the filling. For savory pies, ensure the filling is hot and bubbly throughout. Allow the pie to rest before slicing to maintain its structure. Experiment with different baking techniques, such as adding a lattice top or brushing the crust with egg wash, for a personalized touch. Remember, baking times may vary depending on your oven’s performance, so keep an eye on the pie’s progress. A perfectly baked pie crust should be flaky, golden, and complement the filling beautifully. Always handle the pie gently when removing it from the oven to prevent cracking. For double-crust pies, ensure the slits on top allow steam to escape during baking. This prevents the filling from boiling over and helps the crust bake evenly. If using a convection oven, reduce the temperature by 25°F (15°C) to avoid over-browning. Don’t forget to let the pie cool completely before refrigerating or freezing, as this helps prevent sogginess in the crust. Baking the filled pie is the final step in creating a delicious, homemade treat that’s sure to impress. With practice, you’ll master the art of achieving the perfect balance between a flaky crust and a well-cooked filling. Always store leftovers in an airtight container to maintain freshness. Enjoy your homemade masterpiece!
Troubleshooting Common Issues
Common issues include crust failure, sogginess, or burning. Adjust oven temperature, ensure proper thawing, and use foil to prevent burning. Prick crusts thoroughly to avoid air bubbles.
Crust Failure During Baking
Crust failure during baking can be frustrating but is often preventable. Common causes include incorrect oven temperature, insufficient thawing, or over-pricking the dough. To avoid this, ensure your oven is preheated to the recommended 375°F (190°C) and thaw the crust as instructed. Over-pricking can weaken the structure, so prick only thoroughly enough to prevent air bubbles. If using a frozen crust, baking directly without thawing may lead to uneven cooking. Always place the pie on a baking sheet in the center of the oven for even heat distribution. Monitor baking time closely, as overbaking can cause the crust to crack or become brittle. Proper handling and adherence to instructions will help achieve a flaky, intact crust every time.
Sogginess in the Crust
Sogginess in the crust can occur due to underbaking, high moisture in the filling, or improper thawing. To prevent this, ensure the crust is baked until golden brown, typically 12-15 minutes for a pre-baked shell. Blind baking, where the crust is baked without filling, is crucial for moisture-rich fillings like cream or pudding. Use pie weights or beans to keep the crust flat and promote even drying. Avoid overfilling, as excess liquid can seep into the crust. For filled pies, bake at 375°F (190°C) until the crust is golden and the filling is set. Proper ventilation in the oven and a baking sheet under the pie can also help reduce sogginess. Following these steps ensures a crisp, flaky crust every time.
Preventing Crust Burning
Preventing crust burning requires careful monitoring and proper baking techniques. Always preheat your oven to the recommended temperature (typically 375°F for Marie Callender crusts) and place the pie on a baking sheet in the center of the oven. For filled pies, bake at 400°F for 65-70 minutes, or until the crust is golden. To avoid burning, cover the edges with aluminum foil after 15 minutes of baking. Use pie weights or beans for blind baking to prevent the crust from bubbling and promote even browning. Ensure the crust is pricked thoroughly before baking to allow steam to escape. If using a filling, bake until the crust is golden and the filling is set. Proper ventilation and avoiding overcrowding in the oven also help prevent burning, ensuring a perfectly baked crust every time.

Advanced Baking Techniques
Elevate your pie-baking skills with advanced techniques like creating lattice tops or braided crusts. Experiment with homemade vs. store-bought crusts for unique textures and flavors, ensuring perfect results every time.
Homemade Crust vs. Store-Bought
When deciding between homemade and store-bought crusts, consider time and taste. Homemade crusts offer customization and a flaky texture but require effort and skill; Store-bought options, like Marie Callender’s, provide convenience and consistency, perfect for quick recipes. Many bakers find success with store-bought crusts, as they simplify the process without sacrificing flavor. However, homemade crusts allow for creative ingredient choices, such as using butter for a richer taste or alternative flours for dietary needs. Ultimately, the choice depends on your priorities—time, taste, or customization. Both methods can yield delicious results, so choose what best fits your baking style and schedule. This flexibility ensures every pie turns out perfectly, whether homemade or store-bought.
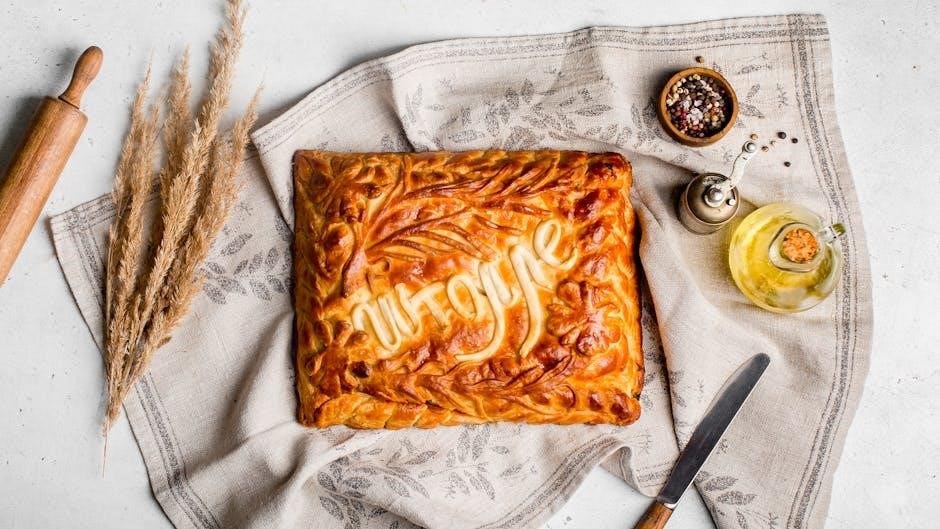
Creating a Lattice Top Crust
Creating a lattice top crust adds a decorative touch to your pie. Start by thawing the crust slightly, then roll it out into a thin sheet. Use a pastry cutter or knife to cut strips of equal width. Place half the strips on a baking sheet, weaving them into a lattice pattern. Brush the edges with a little water or egg wash for a golden finish. Gently place the lattice over the filled pie, trimming excess dough. Crimp the edges to seal the crust. Bake as instructed, ensuring the lattice browns evenly. This technique enhances both the appearance and texture of your pie, making it a standout dessert. Perfect for showcasing your baking skills, a lattice top adds a professional touch to any pie.
Oven Temperature and Settings
Preheat your oven to 375°F (190°C) for optimal results when baking Marie Callender pie crusts. Proper preheating ensures even baking and a golden-brown finish. Always follow package instructions for precise temperature settings to achieve the best results.
Recommended Temperature for Baking
The ideal temperature for baking Marie Callender pie crusts is 375°F (190°C). This temperature ensures even cooking and helps achieve a golden-brown crust without burning. Preheat your oven to this setting before placing the pie shell on a baking sheet. For pre-baked shells, bake for 12-15 minutes, or until lightly golden. If filling the crust, adjust the temperature according to the filling’s requirements, typically between 350°F and 400°F. Always thaw the crust slightly before baking to prevent sogginess. Prick the bottom and sides with a fork to allow steam to escape, promoting an even bake. For filled pies, bake at 375°F until the crust is golden and the filling is set, usually 40-50 minutes. Adjusting the temperature slightly may be needed for specific fillings, but 375°F remains the standard for most recipes.
Adjusting Baking Time for Different Fillings
When baking Marie Callender pie crusts with different fillings, adjust the baking time to ensure the crust and filling are perfectly cooked. For fruit fillings like cherry or apple, bake at 375°F for 40-50 minutes, or until the crust is golden and the filling bubbles. Cream-based fillings, such as banana cream or coconut cream, require a slightly lower temperature of 350°F for 35-45 minutes to prevent curdling. Savory pies, like chicken pot pie, should be baked at 400°F for 25-35 minutes to ensure the crust is flaky and the filling is heated through. For meringue pies, bake at 350°F for 30-40 minutes, watching closely to avoid burning the meringue. Always cover the edges with foil if they start browning too quickly. Adjust times based on filling type and oven performance for optimal results.
Thawing and Handling Instructions
Properly thawing and handling Marie Callender pie crusts ensures optimal results. Thaw the crust at room temperature for 10-15 minutes or refrigerate overnight. Handle gently to avoid tears and refrigerate after thawing for stability.
Thawing Methods for Pie Crust
Thawing Marie Callender pie crusts is a straightforward process that ensures the dough remains pliable and ready for baking. The most recommended method is to thaw the crust at room temperature for about 10 minutes. This allows the crust to soften slightly while retaining its structure. Alternatively, you can thaw the crust overnight in the refrigerator, which helps maintain its shape and prevents tearing. Some bakers prefer to bake the crust directly from the frozen state, though thawing is generally recommended for better results. Regardless of the method, always handle the crust gently to avoid stretching or tearing. Once thawed, refrigerate the crust for 10-15 minutes before baking to firm it up, ensuring a flaky texture. Proper thawing and handling are key to achieving a perfectly baked pie crust.
Handling Frozen Crusts
Proper handling of frozen Marie Callender pie crusts is essential to maintain their quality and structure. Always store frozen crusts in their original packaging or a sealed, airtight container to prevent freezer burn and absorption of odors. When transporting frozen crusts, keep them flat and away from direct sunlight or heat sources to avoid partial thawing. Handle the crusts gently to prevent cracking or bending, as this can cause breakage during baking. If you notice any signs of damage or freezer burn, it’s best to use the crust immediately. Never refreeze a partially thawed crust, as this can compromise its texture and integrity. By following these guidelines, you can ensure your frozen pie crusts remain fresh and ready for baking whenever you need them.